This remainds me of a similar trend 15 years ago where people replaced original E2/NAC monitors with VGA monitors. The motivation was to move from 240P to 480P and from Jamma plug to VGA connector (easier to plug to a PC with emulators).
See the parallelism
Nowadays, It is well-know that E2/NAC monitors are the pinnacle of 240P arcade gaming.
What it is not well-known (at least by people replacing Vewlix monitors) is that most Vewlix have a special native resolution for arcade games (1366x768). This native resolution is very hard (or imposible) to obtain on consumer LCDs. This is the very same resolution that HD arcade systems (such as Taito Type X/X2/X3/X4) were designed for. So, if one wants to achieve arcade high fidelity better keep the original Vewlix monitor.
If your motivation for replacing the monitor is that your monitor looks dark, yellow, or both, then I suggest fixing that instead of replacing the monitor. Jan pioneered a tutorial for cleaning Vewlix monitors. That helped a lot of people.
Next, I show you how to go deep on the process of cleaning the monitor. As with Jan’s tutorial, there is a high risk of breaking things if you are not ultra-cautious.
First, when you follow Jan’s tutorial you are cleaning, literally, the surface of the problem.
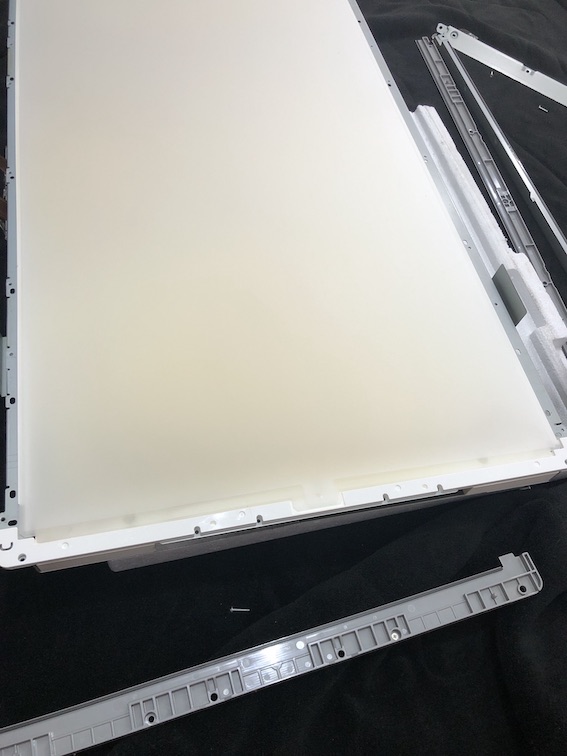
This could be enough in some cases. However, the diffuser has three layers and the last layer is where the bigger source of yellowish is.

Fun fact, one friend bought this monitor and seller described the monitor as very good condition. Hopefully, it is possible to clean it.
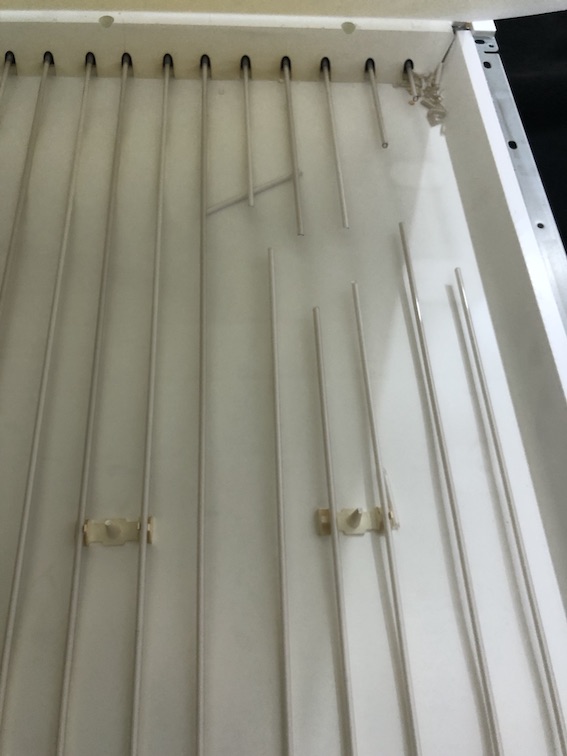
But there is more. The backlight is under the diffusers. These monitors have CCFL tubes for backlighting (the same technology than a Vewlix has for illuminating the instruction card of the control panel).
I think that for the arcade community is better to think on ways of fixing monitors than on ways of installing consumer monitors.
Nevertheless, if you want to install an 8K-TV on your Vewlix to play 240P 16:9-forced arcade games, I have my