Andy has some Sega A001 locks and keys here that'll fit, although they're not the ones that would've been on your Blast originally...
http://triplemoonstar.brinkster.net/the ... =168955500"
Nice price too. You'll have to source the correct latches separately though.
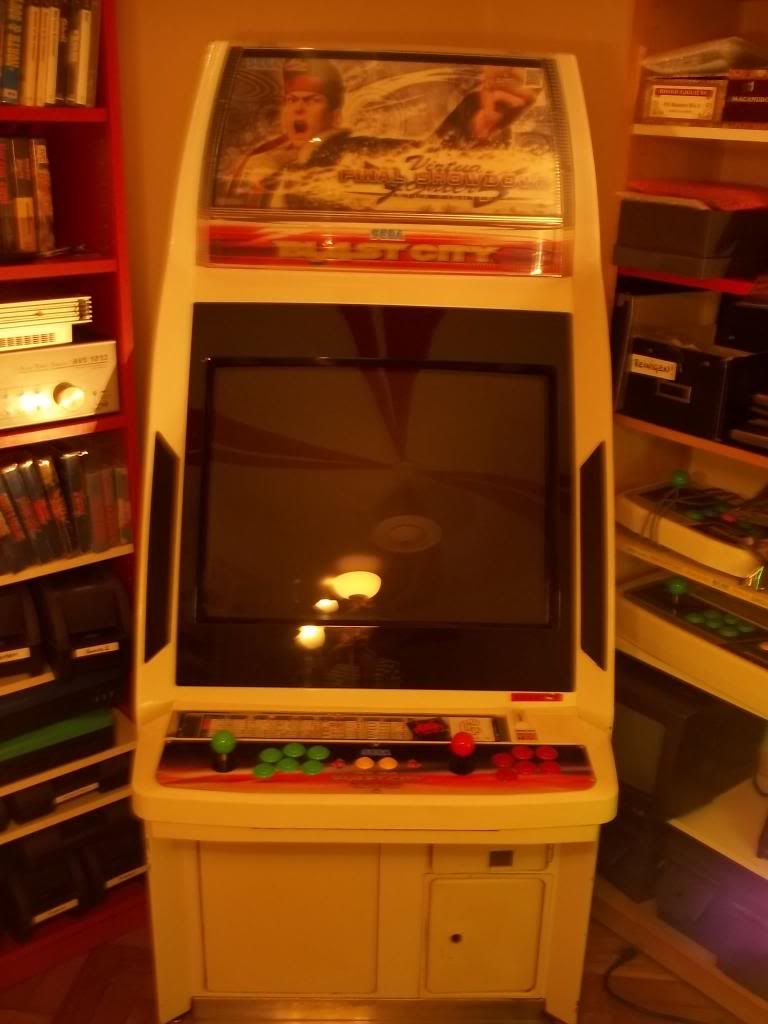
Randy's Refurbishment - A Blast City Restauration
-
crunchywasp

- stompin' an' jumpin'
- Posts: 8104
- Joined: February 10th, 2012, 2:51 pm
- Location: Northern Ireland
- eBay: crunchywasp
- Initials: MAK
-
ninn

- TheRedKnight's Lover
- Posts: 934
- Joined: September 5th, 2011, 1:24 pm
- Location: Vienna, Austria, Europe
- eBay: 8bitbitch
Re: Randy's Refurbishment - A Blast City Restauration
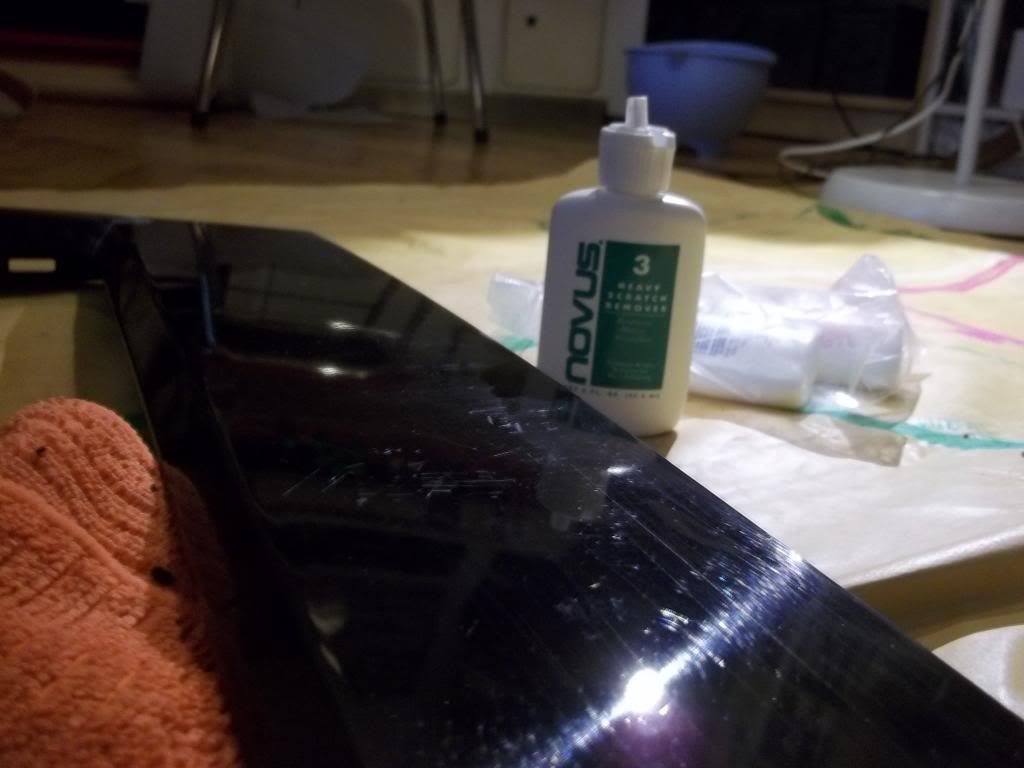
Ok, I finished The Novus stage.
My forefinger, which applied the pressure, and my whole arm hurts now.
I am not used to wiggle back and forth for several hours - normally it just takes 5 minutes.
Ok, here are the pictures. And you can believe me: I am very proud about the end result.
But, first:
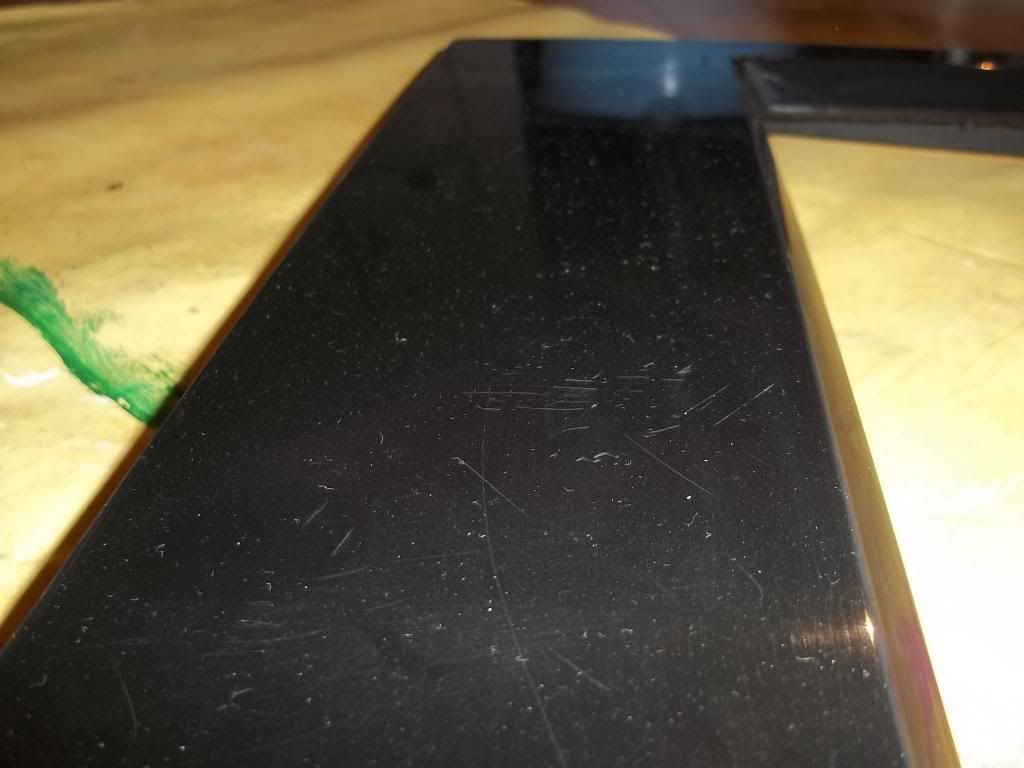
Generally speaking, that bezel was full of scratches, - some very quite long, others looked like they were done with a ice scraping tool.
Here, you can see the two worst scratches:
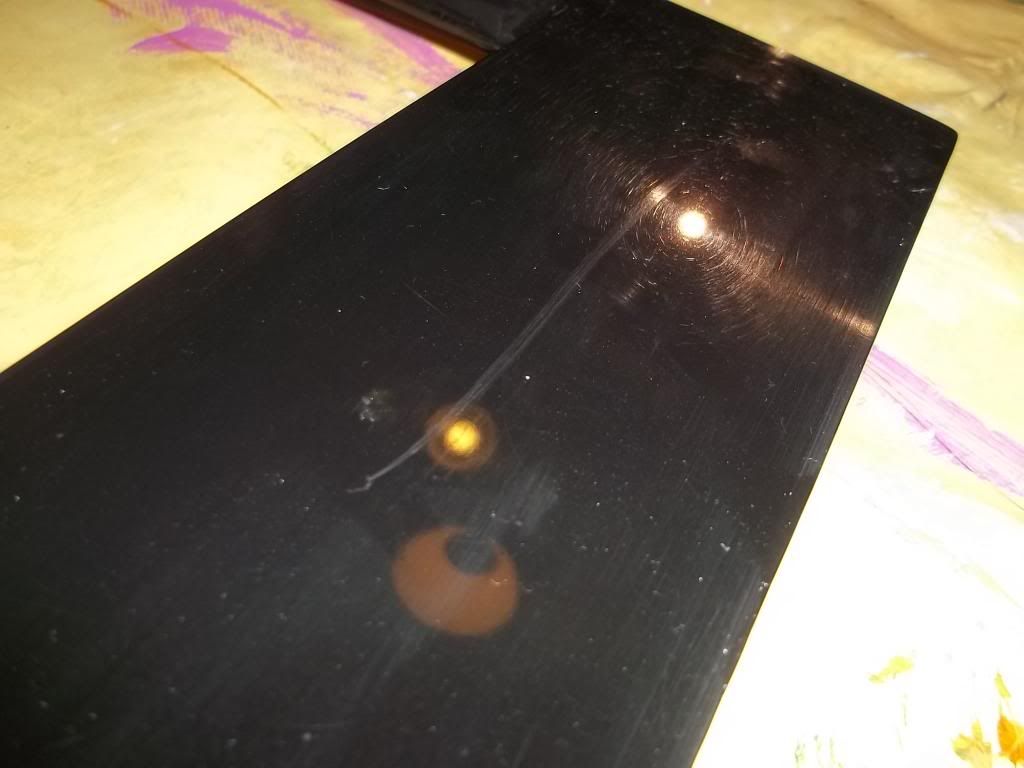
The bezel was literally scattered with scratches, all over.
You could definitely see its usage.
So .. lets put Novus to work. I just used an ordinary dishcloth and muscle power:
After Novus 3, I took a break, because I could not take it anymore... my arm was hurting.
The next day, I applied some more Novus 3, gave it a second short scrub, before my head started aching.
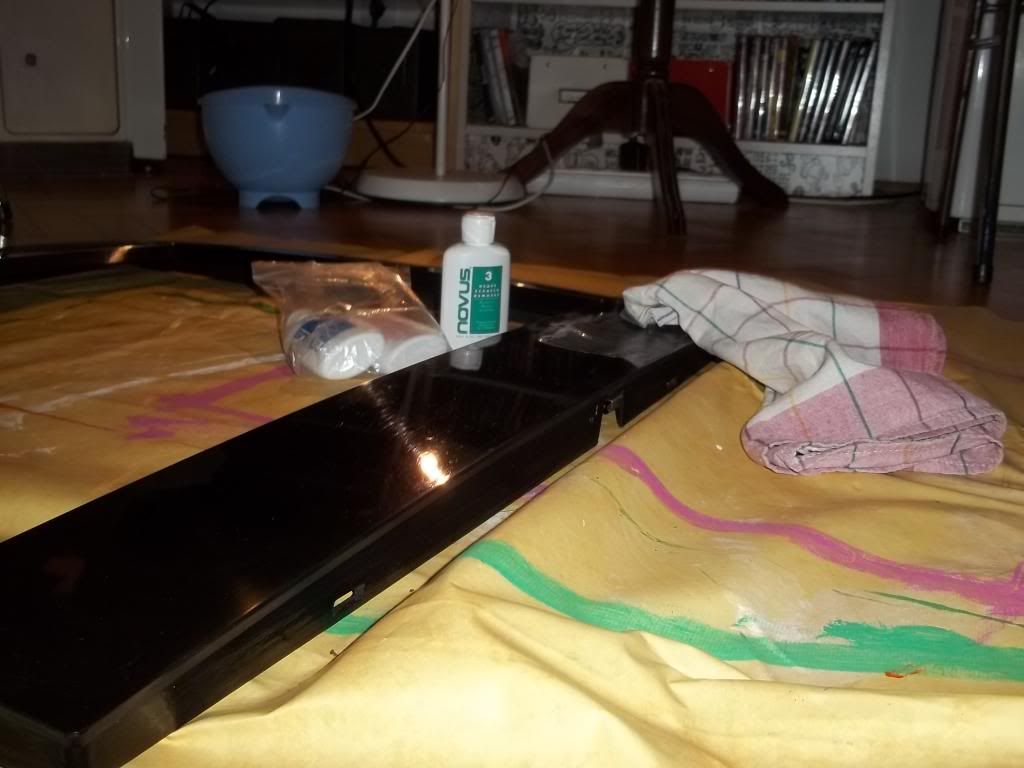
It started looking a lot better. I was not able to remove all scratches completely, they were just too deep - but I did not expect that. Though, they became a lot less visible, and the bezel started to shine again:
Yesterday, I finished the work off with Novus 2 and 1.
Novus 2 is still a pain in the arm, but not like Novus 3. And Novus 1 is just the reward.
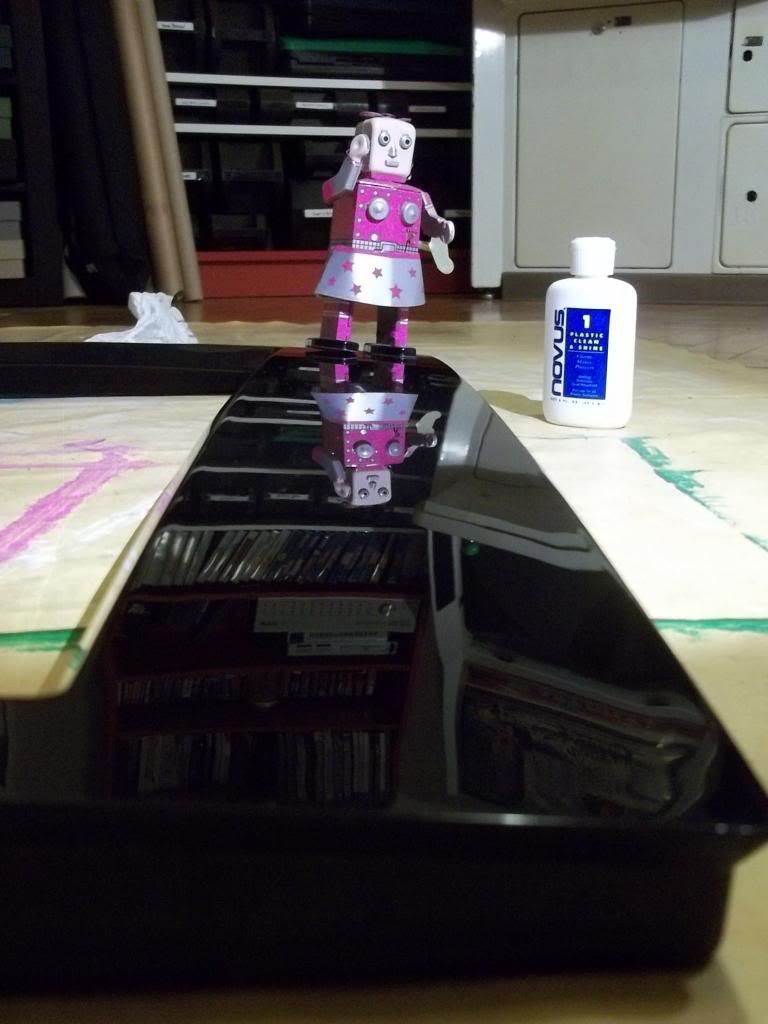
I was very happy with the end result!
Here, you can see fembot at the last stage of quality control, saluting the guys and girls at Novus!
Not sure how long it took, but all steps combined I guess it took about three to four hours.
Well worth it.
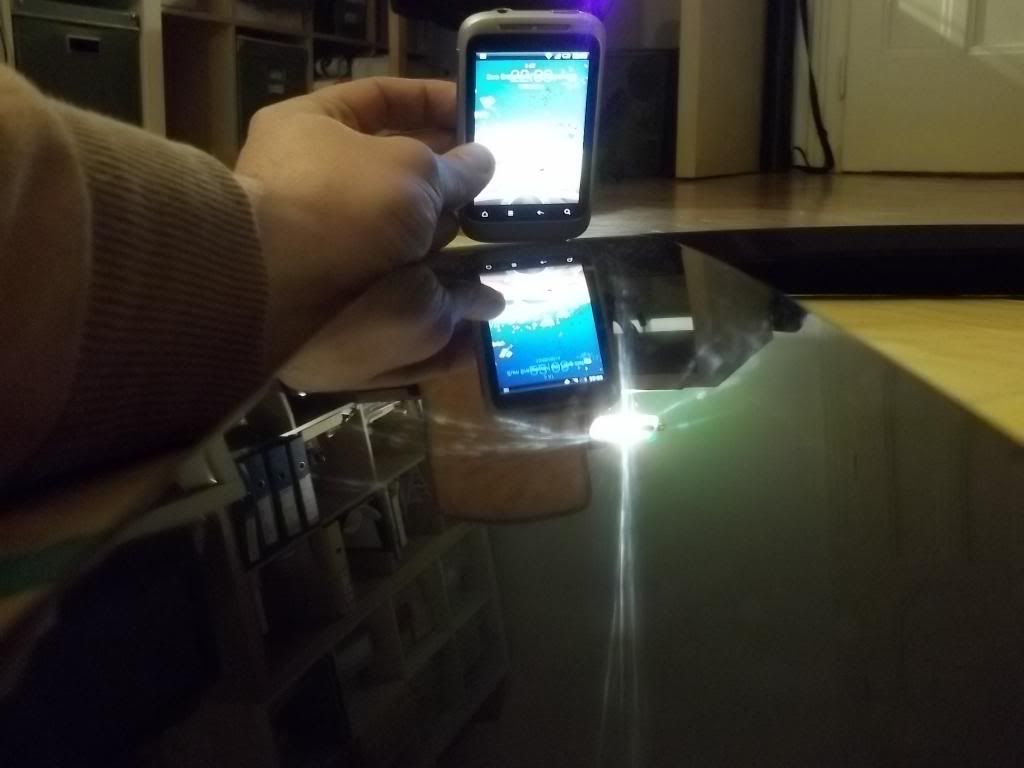
It looks absolutely fantastic when you approach Randy.
Walking towards him, at first, you can see reflection of the ceiling with its red waves , then you see yourself ... very impressive.
It even feels supersmooth.
But on the inside, he is still a dirty one ...
Who wants to clean that up?
My forefinger, which applied the pressure, and my whole arm hurts now.
I am not used to wiggle back and forth for several hours - normally it just takes 5 minutes.
Ok, here are the pictures. And you can believe me: I am very proud about the end result.
But, first:
Generally speaking, that bezel was full of scratches, - some very quite long, others looked like they were done with a ice scraping tool.
Here, you can see the two worst scratches:
The bezel was literally scattered with scratches, all over.
You could definitely see its usage.
So .. lets put Novus to work. I just used an ordinary dishcloth and muscle power:
After Novus 3, I took a break, because I could not take it anymore... my arm was hurting.
The next day, I applied some more Novus 3, gave it a second short scrub, before my head started aching.
It started looking a lot better. I was not able to remove all scratches completely, they were just too deep - but I did not expect that. Though, they became a lot less visible, and the bezel started to shine again:
Yesterday, I finished the work off with Novus 2 and 1.
Novus 2 is still a pain in the arm, but not like Novus 3. And Novus 1 is just the reward.
I was very happy with the end result!
Here, you can see fembot at the last stage of quality control, saluting the guys and girls at Novus!
Not sure how long it took, but all steps combined I guess it took about three to four hours.
Well worth it.
It looks absolutely fantastic when you approach Randy.
Walking towards him, at first, you can see reflection of the ceiling with its red waves , then you see yourself ... very impressive.
It even feels supersmooth.
But on the inside, he is still a dirty one ...
Who wants to clean that up?
-
Chempop

- Please Continue...
- Posts: 1045
- Joined: May 13th, 2011, 6:13 pm
- Location: North East USA
- eBay: Weegzon
- Initials: GLX
Re: Randy's Refurbishment - A Blast City Restauration
Wow awesome! I need to do the same on all three of my bezels, hmm how much novus will I need do you think? I am tempted to bid on a set of 8oz bottles but not sure if that's enough. 
Randy is looking great
Randy is looking great
-
ninn
- TheRedKnight's Lover
- Posts: 934
- Joined: September 5th, 2011, 1:24 pm
- Location: Vienna, Austria, Europe
- eBay: 8bitbitch
Re: Randy's Refurbishment - A Blast City Restauration
Thanks!
I have the 2oz Bottles.
Served me 2 bezels and a control panel so far.
Novus3 is feeling almost empty now.
I think 2oz should be easily enough for 3 mildly scratched bezels.
I have the 2oz Bottles.
Served me 2 bezels and a control panel so far.
Novus3 is feeling almost empty now.
I think 2oz should be easily enough for 3 mildly scratched bezels.
-
emphatic

- Breastfeeds when required
- Posts: 5909
- Joined: April 7th, 2009, 4:14 pm
- Location: Alingsås, Sweden
- eBay: jorgen_sjolander
- Initials: JOR
Re: Randy's Refurbishment - A Blast City Restauration
Fantastic work!
My games: http://www.emphatic.se
-
TheRedKnight

- CNITELIEF
- Posts: 3461
- Joined: March 19th, 2012, 7:22 am
- Location: Finland
- eBay: aaaveajajaja
Re: Randy's Refurbishment - A Blast City Restauration
Now that is shiny! 
Emulation's nice when done well
-
meijin

- Posts: 438
- Joined: March 23rd, 2012, 12:47 pm
- Location: Munich, Germany
Re: Randy's Refurbishment - A Blast City Restauration
It looks really shiny now
After seeing the results here, I think it's time to do something similar with my Blast, too.
@ Ninn, could you recommend some shop where I can buy this Novus polish? Found only some at Ebay.de
Btw. I'm really looking forward to this part
"adjust monitor / convergence"
Like every Blast owner I have the same problems... Do you want to fix it with magnet tapes?
-
geotrig

- Potato!
- Posts: 7791
- Joined: December 5th, 2008, 1:14 pm
- Location: ._.
- eBay: ._.
Re: Randy's Refurbishment - A Blast City Restauration

<trk>:I remember catching a big fat one and my friend said "throw it back in, that one already tastes like wood"
-
urbanledge

- Please Continue...
- Posts: 115
- Joined: January 12th, 2013, 11:07 pm
- Location: Naas,Ireland
Re: Randy's Refurbishment - A Blast City Restauration
Me too,meijin wrote: Btw. I'm really looking forward to this part
"adjust monitor / convergence"
Like every Blast owner I have the same problems... Do you want to fix it with magnet tapes?
hows yours for side compression?
Mines fcuked !
-
meijin
- Posts: 438
- Joined: March 23rd, 2012, 12:47 pm
- Location: Munich, Germany
Re: Randy's Refurbishment - A Blast City Restauration
I have the typical corner convergence issues. Really strong ones in the upper right corner, more or less only a bit in the other corners.
Nevertheless some day I want to fix it. The Nanao 2930 is a really nice monitor with great scanlines (imho), but those convergence issues suck...
Nevertheless some day I want to fix it. The Nanao 2930 is a really nice monitor with great scanlines (imho), but those convergence issues suck...
-
arcadegame
- #cavesunday
- Posts: 212
- Joined: April 7th, 2012, 6:00 pm
- Location:
Re: Randy's Refurbishment - A Blast City Restauration
Great work
I really like how is super shiny
I really like how is super shiny
-
TechnoFreek
- Please Continue...
- Posts: 154
- Joined: March 20th, 2012, 1:47 pm
- Location: Ireland
- eBay: technofreek1
- Initials: OPM
Re: Randy's Refurbishment - A Blast City Restauration
How do you know how much of each stage of novus liquid to use?
-
ninn
- TheRedKnight's Lover
- Posts: 934
- Joined: September 5th, 2011, 1:24 pm
- Location: Vienna, Austria, Europe
- eBay: 8bitbitch
Re: Randy's Refurbishment - A Blast City Restauration
(edit) I misunderstood the question ... but to answer short: Used a squirt, 'till it went all black and dry. then used another squirt.
---
I used each stage till I my arm hurt too much ...
Novus 3 is the heavy scratch remover.
You use it in a right angle to the scratch.
After doing that for a while, you see the scratch vanishing.
You wipe the gunk off, and have a look at your work.
Either the scratch disappeared, - or it stayed.
If you cant see it anymore, you will not be able to find the spot you just polished again. That place is done.
But, you will spot another scratch. somewhere else.
repeat.
---
After Novus 3, the surface is already very smooth and shiny. It is not like sandpaper, where you can see visible scartches, it is already very shiny. after Novus 3, i spent some more time with Novus 2. You dont use it at right angle, your use it in a round motion. I guess the idea is to blend everything together. It is not very hard to use, and i was not applying a lot force, so it was a lot easier to work with - the main work was done already. It is a lot faster to work with, because there arent scratches anymore.
Novus 1 is just like a liquid. It is hard to keep on the surface, because it runs down, and soaks into the cloth quite fast. I think is is just some kind of alcohol, that helps to remove dirt, evaporates fast and leaves no staines. I dont think it adds a lot, but is is quite fast and the reward. No point in skipping the last 5 minutes when you worked for an hour.
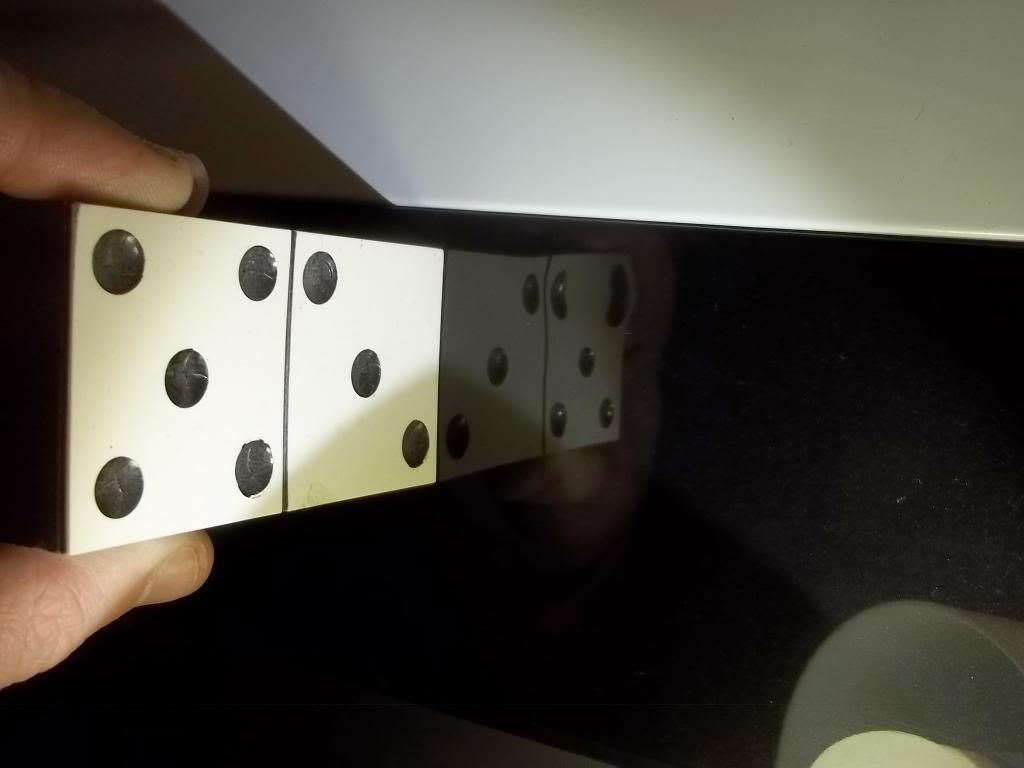
Keep in mind, that you remove material with Novus. It is not obvious in the photos I've taken, but taking the deep scratches out deformed the surface. It looks a lot like a dent now. it is not bad, ecause it is a dent without a sharp edge [ ], but a supersmooth dent nevertheless. It "bends" light in a different way than a flat surface. Kinda like the effect they use to simulate black holes in science documentaries.
superhard to photograph....
---
I used each stage till I my arm hurt too much ...
Novus 3 is the heavy scratch remover.
You use it in a right angle to the scratch.
After doing that for a while, you see the scratch vanishing.
You wipe the gunk off, and have a look at your work.
Either the scratch disappeared, - or it stayed.
If you cant see it anymore, you will not be able to find the spot you just polished again. That place is done.
But, you will spot another scratch. somewhere else.
repeat.
---
After Novus 3, the surface is already very smooth and shiny. It is not like sandpaper, where you can see visible scartches, it is already very shiny. after Novus 3, i spent some more time with Novus 2. You dont use it at right angle, your use it in a round motion. I guess the idea is to blend everything together. It is not very hard to use, and i was not applying a lot force, so it was a lot easier to work with - the main work was done already. It is a lot faster to work with, because there arent scratches anymore.
Novus 1 is just like a liquid. It is hard to keep on the surface, because it runs down, and soaks into the cloth quite fast. I think is is just some kind of alcohol, that helps to remove dirt, evaporates fast and leaves no staines. I dont think it adds a lot, but is is quite fast and the reward. No point in skipping the last 5 minutes when you worked for an hour.
Keep in mind, that you remove material with Novus. It is not obvious in the photos I've taken, but taking the deep scratches out deformed the surface. It looks a lot like a dent now. it is not bad, ecause it is a dent without a sharp edge [
superhard to photograph....
-
denson

- Please Continue...
- Posts: 517
- Joined: February 22nd, 2012, 10:36 am
- Location: Norwich, Norfolk
- eBay: chubba100
Re: Randy's Refurbishment - A Blast City Restauration
That bezel looks awesome! Worth having a subtle 'dent' rather than an obvious scratch IMO too 

-
ninn
- TheRedKnight's Lover
- Posts: 934
- Joined: September 5th, 2011, 1:24 pm
- Location: Vienna, Austria, Europe
- eBay: 8bitbitch
Re: Randy's Refurbishment - A Blast City Restauration
Got mine from ebay too. I have no idea where else I could have looked. Same for T-Cut, GooGone and similar stuff.meijin wrote:
@ Ninn, could you recommend some shop where I can buy this Novus polish? Found only some at Ebay.de
My convergence is pretty good, I expected it to be a lot worse.meijin wrote:
Btw. I'm really looking forward to this part
"adjust monitor / convergence"
Like every Blast owner I have the same problems... Do you want to fix it with magnet tapes?
Nobody complained so far, and it is not really necessary to fix.
But, compared to my MS9, the corners just suck.
But I'd like to tweak the monitor. and fixing convergence is part of that.
Yes, I'd like to build those convergence strips and get shocked while installing them.
I know there are rumors out there, that they can be easily made, but I have never seen someone actually installing or using selfmade strips.
I'd like to try it at least.
-
crunchywasp
- stompin' an' jumpin'
- Posts: 8104
- Joined: February 10th, 2012, 2:51 pm
- Location: Northern Ireland
- eBay: crunchywasp
- Initials: MAK
Re: Randy's Refurbishment - A Blast City Restauration
Excellent job on the bezel
My Blast had pretty bad convergence in one corner but it wasn't so bad in the other 3. It was my intention to fix it at some point but over time it stopped bothering me really. I think there's quite an art to correcting it with strips and it's pretty tricky. I'm sure you'll manage with some perseverance though
My Blast had pretty bad convergence in one corner but it wasn't so bad in the other 3. It was my intention to fix it at some point but over time it stopped bothering me really. I think there's quite an art to correcting it with strips and it's pretty tricky. I'm sure you'll manage with some perseverance though

-
meijin
- Posts: 438
- Joined: March 23rd, 2012, 12:47 pm
- Location: Munich, Germany
Re: Randy's Refurbishment - A Blast City Restauration
Cheers, then mine will be also those from ebayninn wrote:Got mine from ebay too. I have no idea where else I could have looked. Same for T-Cut, GooGone and similar stuff.
Yeah those rumorsninn wrote:Yes, I'd like to build those convergence strips and get shocked while installing them.
I know there are rumors out there, that they can be easily made, but I have never seen someone actually installing or using selfmade strips.
I'd like to try it at least.
There is this one video, but I guess you know it already.
http://www.youtube.com/watch?v=QYB1L8AIeq4"
It would be also interesting to know the specs about the magnet (strength) or the tape (thickness), before tweaking the convergences several hours in front of a mirror...
But I'm looking really forward to this thread in general. Giving us a documentary on tweaking the convergence is more worth than the first man on the moon
-
PrincessPrinPrin

- Posts: 608
- Joined: April 7th, 2011, 4:00 pm
- Location: Pordenone, Italy
- eBay: *mkl*
- Initials: MKL
Re: Randy's Refurbishment - A Blast City Restauration
Lots of misinformation on this. They aren't magnets. Their property is to shield from a magnetic field, not make one. The materials used are permalloy, ferrite, mu-metal. Not pieces of a coke can or a cutter...meijin wrote:It would be also interesting to know the specs about the magnet (strength) or the tape (thickness), before tweaking the convergences several hours in front of a mirror...
Actual magnets, when used (rarely), are placed on the funnel, farther away from the yoke.
-
meijin
- Posts: 438
- Joined: March 23rd, 2012, 12:47 pm
- Location: Munich, Germany
Re: Randy's Refurbishment - A Blast City Restauration
I thought that we are talking about this!?PrincessPrinPrin wrote:Actual magnets, when used (rarely), are placed on the funnel, farther away from the yoke.
-
Paulie

- Opens wallet, moths fly out
- Posts: 2599
- Joined: September 28th, 2011, 5:43 pm
- Location: East Ardsley, West Yorks
- eBay: retro-paulie
- Initials: PSG
Re: Randy's Refurbishment - A Blast City Restauration
Fantastic work on the bezel
Novus FTW
Novus FTW