Sega Naomi restoration WIP - Updated Sept 2015
-
IDCHAPPY

- c***3
- Posts: 2609
- Joined: May 3rd, 2010, 7:25 pm
- Location: Edinburgh
- eBay: Arcadedreams2013
- Initials: IDC
Re: Sega Naomi restoration WIP - Updated Mon 11/02/13
Sorry for the bump, some great pics in here are and great work again mate 
Give me a like on Facebook at:
https://www.facebook.com/pages/Arcadedr ... ef=tn_tnmn
https://www.facebook.com/pages/Arcadedr ... ef=tn_tnmn
-
trev1976

- Posts: 881
- Joined: March 30th, 2009, 7:17 pm
- Location: Southampton
Re: Sega Naomi restoration WIP - Updated Mon 11/02/13
Great thread , loads of useful info
Check out my "1cc" YouTube Channel
YouTube
YouTube
-
monouchi

- Polishing his shaft
- Posts: 1130
- Joined: February 21st, 2010, 6:16 pm
- Location: Sweden
- eBay: monouchi_jn
- Initials: BUS
Re: Sega Naomi restoration WIP - Updated Mon 11/02/13
Agree. 
Gives me lots of help now when I am taking apart my Naomi.
Gives me lots of help now when I am taking apart my Naomi.
-
Nandi
- Posts: 24
- Joined: March 19th, 2014, 12:34 pm
- Location: Budapest
- Initials: NND
Re: Sega Naomi restoration WIP - Updated Mon 11/02/13
Hey,
I don't know if this is the right place for my question, but I did not want to open a new topic for it.
How hard is it to remove the whole control panel for transportation purposes? Is it possible by removing only the 4 bolts and the 2 fixing plates inside?
Thank you,
Nandi
I don't know if this is the right place for my question, but I did not want to open a new topic for it.
How hard is it to remove the whole control panel for transportation purposes? Is it possible by removing only the 4 bolts and the 2 fixing plates inside?
Thank you,
Nandi
-
Paulie

- Opens wallet, moths fly out
- Posts: 2599
- Joined: September 28th, 2011, 5:43 pm
- Location: East Ardsley, West Yorks
- eBay: retro-paulie
- Initials: PSG
Re: Sega Naomi restoration WIP - Updated Mon 11/02/13
It's very easy to remove to front panel, but you need to do more than remove the 4 bolts. Page 2 of this thread gives you step by step instructions with photographs.
1. Remove the 4 screw caps (NOA-1008)
2. Take out the 4 tamper proof screws (M6x25) and the 2 screws (M4x12 w/flat & spring washers)
3. Remove the ASSY front panel
4. Disconnect the necessary wiring, possibly a earth cable too, but its been a while
4 Remove the 4 bolts and this will release the 2 fixing plates (NOA 1009)
Just remember to support it, you don't want it dropping to the ground and breaking
-
Nandi
- Posts: 24
- Joined: March 19th, 2014, 12:34 pm
- Location: Budapest
- Initials: NND
Re: Sega Naomi restoration WIP - Updated Mon 11/02/13
So I have to remove the front assembly.Paulie wrote:It's very easy to remove to front panel, but you need to do more than remove the 4 bolts. Page 2 of this thread gives you step by step instructions with photographs.
1. Remove the 4 screw caps (NOA-1008)
2. Take out the 4 tamper proof screws (M6x25) and the 2 screws (M4x12 w/flat & spring washers)
3. Remove the ASSY front panel
4. Disconnect the necessary wiring, possibly a earth cable too, but its been a while
4 Remove the 4 bolts and this will release the 2 fixing plates (NOA 1009)
Just remember to support it, you don't want it dropping to the ground and breaking
Thank you for your fast response!
-
Paulie
- Opens wallet, moths fly out
- Posts: 2599
- Joined: September 28th, 2011, 5:43 pm
- Location: East Ardsley, West Yorks
- eBay: retro-paulie
- Initials: PSG
Re: Sega Naomi restoration WIP - Updated Mon 11/02/13
Yep, but it'll only take you a couple of mins to remove the front panel. handle it carefully as they are a large bit of plastic that can be quite brittle/ fragile.
-
Nandi
- Posts: 24
- Joined: March 19th, 2014, 12:34 pm
- Location: Budapest
- Initials: NND
Re: Sega Naomi restoration WIP - Updated Mon 11/02/13
Well, after all I could not disassembly it, because I was stupid enough to bring only regular Torx bits with me, but for the record: a Sega Naomi does fit in a BMW X3, if you are desperate enough.
-
Paulie
- Opens wallet, moths fly out
- Posts: 2599
- Joined: September 28th, 2011, 5:43 pm
- Location: East Ardsley, West Yorks
- eBay: retro-paulie
- Initials: PSG
Re: Sega Naomi restoration WIP - Updated Sept 2015
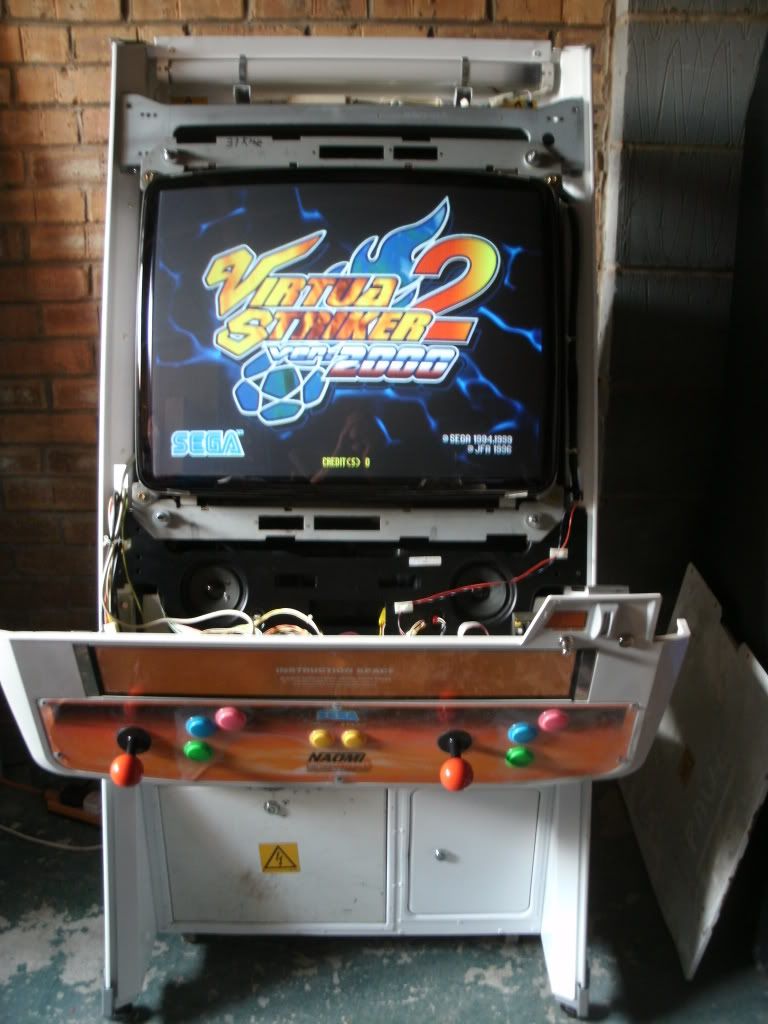
Well it's been a while, almost 3 1/2 years since i picked up the cab up, but I still have her and still love my Naomi
Last week I picked up a new monitor from denson, thanks again buddy I'm really pleased with it. It's a Rodotron Chassis on a Sanwa 29e31s tube. Obviously you forgo a little picture quality for versatility and it may not be as nice as a pf or pfx but I've missed the last couple that have come up for sale and for the price I paid I think this was an excellent purcahse and I'm very satisfied
Swapping it out couldn't be easier. Whip off the plastic mask and the back of the cab, undo the VGA cable, the power cable, the speakers and the 4 nuts the hold the monitor in place and just swap the bushes and monitors over. Due to the curvature I had to swap the bezel, again supplied by Darren but that's only about half a dozen screws.

I also painted the front mobo door, going from this which was pretty yellowed and beat up
To this

I still have the leg covers to strip and the big hatch lid to respray but there's no rush
Last week I picked up a new monitor from denson, thanks again buddy
Swapping it out couldn't be easier. Whip off the plastic mask and the back of the cab, undo the VGA cable, the power cable, the speakers and the 4 nuts the hold the monitor in place and just swap the bushes and monitors over. Due to the curvature I had to swap the bezel, again supplied by Darren but that's only about half a dozen screws.
I also painted the front mobo door, going from this which was pretty yellowed and beat up
To this

I still have the leg covers to strip and the big hatch lid to respray but there's no rush
-
crunchywasp

- stompin' an' jumpin'
- Posts: 8105
- Joined: February 10th, 2012, 2:51 pm
- Location: Northern Ireland
- eBay: crunchywasp
- Initials: MAK
Re: Sega Naomi restoration WIP - Updated Sept 2015
Nice work Paul, it looks ace. Slow and steady wins the (slow bike) race 

-
Paulie
- Opens wallet, moths fly out
- Posts: 2599
- Joined: September 28th, 2011, 5:43 pm
- Location: East Ardsley, West Yorks
- eBay: retro-paulie
- Initials: PSG
Re: Sega Naomi restoration WIP - Updated Sept 2015
Just ordered a new fluorescent tube from ebay so I hope it reaches me undamaged. I'm going to try a 20w tube, the original is 40w but I thought 20w may be better suited for home use.
If anyone is looking for a replacement then the original is (Sega part Number 390-5695-40-DUK) T12 40w 2ft / 600mm tube. They are not a particularly common tube but can be found on Amazon for around £10 delivered, 20w ones are easier and cheaper to source at around £8.
-
denson

- Please Continue...
- Posts: 517
- Joined: February 22nd, 2012, 10:36 am
- Location: Norwich, Norfolk
- eBay: chubba100
Re: Sega Naomi restoration WIP - Updated Sept 2015
Looking good I reckon in another year or so we should be seeing the finished article!
I think you can also find compatible tubes in b&q and the like (at least I'm sure that's where I've bought some in the past) I'd have to check the wattages on them though.
I think you can also find compatible tubes in b&q and the like (at least I'm sure that's where I've bought some in the past) I'd have to check the wattages on them though.
-
Paulie
- Opens wallet, moths fly out
- Posts: 2599
- Joined: September 28th, 2011, 5:43 pm
- Location: East Ardsley, West Yorks
- eBay: retro-paulie
- Initials: PSG
Re: Sega Naomi restoration WIP - Updated Sept 2015
Cheers Daren, I know  I've got a pair of Dino kings to finish off too.
I am going to make an effort to get this one completed in the very near future though I've not been putting it off as I love tinkering but I just always seem to be busy.
Good to know about the tubes I've spent ages looking on the net this evening for local lighting shops where I could pick one up from and never thought of b&q.
I am going to make an effort to get this one completed in the very near future though
Good to know about the tubes
-
sibeer
- Posts: 8
- Joined: January 11th, 2017, 6:53 pm
- Location: Wirral, UK
- eBay: ecowarm
- Initials: SIB
Re: Sega Naomi restoration WIP - Updated Sept 2015
Thanks so much for this thread Paulie, it has really helped me feel a bit more confident stripping and cleaning my cabinet.
-
rufus
- Posts: 13
- Joined: January 17th, 2016, 7:06 pm
- Location: italy
Re: Sega Naomi restoration WIP - Updated Sept 2015
Yes, I agree, this thread is pure gold.
I'm the only one that have a completely rusted lower box?
I mean, I'm sorry but the metal work made in UK was a total ****!
Is not even primed or something, just a quick paint job that barely cover the exterior and left all the overlapping parts to slowly die
I'm the only one that have a completely rusted lower box?
I mean, I'm sorry but the metal work made in UK was a total ****!
Is not even primed or something, just a quick paint job that barely cover the exterior and left all the overlapping parts to slowly die
-
Shadolf

- Posts: 287
- Joined: November 6th, 2014, 12:20 pm
- Location: East Switzerlandmann
- eBay: 1984indigo
- Initials: SDF
Re: Sega Naomi restoration WIP - Updated Sept 2015
My lower part was also full of rust. I fully striped down the paint, removed rust, primed and pained. But now about 2 years later I can see new rust in the small spaces between the parts.
The primer/paint didn´t fill all those spaces as it should. I think that could only be done with powder coating or remove those rivets, paint all the separeted parts and then put it together again.
The primer/paint didn´t fill all those spaces as it should. I think that could only be done with powder coating or remove those rivets, paint all the separeted parts and then put it together again.
-
rufus
- Posts: 13
- Joined: January 17th, 2016, 7:06 pm
- Location: italy
Re: Sega Naomi restoration WIP - Updated Sept 2015
This is what i'm doing right now.
Rivets are easy, you just drill them out, the real problem are all the spot welds
I'm using special flat head drill bits but they don't last longer, now i will try with a rotary spotweld cutter.
Then i strip the paint, sand to bare metal removing all the rust, priming with epoxy, filler/bondo, 2k acrylic primer, try to reassemble everything back with just seel rivets/screw and finally the 2k base coat.
It's a tough and expensive job by the way and It will take forever
-
sibeer
- Posts: 8
- Joined: January 11th, 2017, 6:53 pm
- Location: Wirral, UK
- eBay: ecowarm
- Initials: SIB
Re: Sega Naomi restoration WIP - Updated Sept 2015
Serious preservation work that. Mine is my first cab and was pretty rough / cheap (£130) as such it wouldn't make sense to go that far.
-
DrChaos
- Please Continue...
- Posts: 6
- Joined: July 2nd, 2015, 8:03 am
- Location: Germany
Re: Sega Naomi restoration WIP - Updated Sept 2015
Paulie, this is the best documentation for dissassembly an chop. It helped me a lot to chop my NAOMI. I am almost done, but is it possible to reactive the pictures for the furture? I assume there are still some uprights which needs to be chopped 
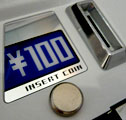
I came back to see if there is an explanation what this little grey box at the power plug does, this thread is helpful in many ways.
I came back to see if there is an explanation what this little grey box at the power plug does, this thread is helpful in many ways.
-
daveyheats

- Please Continue...
- Posts: 30
- Joined: December 5th, 2017, 12:59 pm
- Location: Cheltenham
- eBay: daveyheats
Re: Sega Naomi restoration WIP - Updated Sept 2015
Sorry for the bump, but just to echo what Dr Chaos mentioned....Paulie do you have all of these photos somewhere? I've been reading through this and have the dreaded photobucket 3rd party enable photos of death throughout. Would be brilliant if these are still online somewhere.
Wanted
• New Net City.
• A Mrs who won't go mental when I acquire the above.
• New Net City.
• A Mrs who won't go mental when I acquire the above.