Sega Naomi restoration WIP - Updated Sept 2015

Show off your wares.
User avatar
kevin2me
Posts: 87
Joined: May 1st, 2011, 4:48 pm
Location: Cork, Ireland
eBay: kevin2me2

Re: Sega Naomi restoration work in progress Updated Wed 20/6

Post by kevin2me »

Hey In words of Barney Stinson - "CHALLENGE ACCEPTED" :)
Link : http://forum.arcadeotaku.com/viewtopic. ... 32#p268132

I started a Restore thread on 2 Naomis. Bare in Mind, I'm not aint a Patch on ur skills and never will be, I dont think I have patience :)
but I will try get some parts right to get half decent cab or 2 out of this all going well.
11 Cabs Arcade Room: 1 Vewlix, 2 AWSDs, 2 NNC, 1 Astro, 1 Naomi gun cab, 1 Taito Cocktail, Initial D/Outrun2SP and Sega Rally Twin.
User avatar
Paulie
Opens wallet, moths fly out
Posts: 2599
Joined: September 28th, 2011, 5:43 pm
Location: East Ardsley, West Yorks
eBay: retro-paulie
Initials: PSG

Re: Sega Naomi restoration work in progress Updated Wed 20/6

Post by Paulie »

Nice one Kev, I've just checked it out :awe: stuff. I'm very jelly of the lovely CM cab. And yeah like you I also think that particular black Naomi looks fantastic
User avatar
Paulie
Opens wallet, moths fly out
Posts: 2599
Joined: September 28th, 2011, 5:43 pm
Location: East Ardsley, West Yorks
eBay: retro-paulie
Initials: PSG

Re: Sega Naomi restoration work in progress Updated Wed 20/6

Post by Paulie »

Not much to update.

Today
I Sprayed the hoof's and the leg toppers and they look to have come out really nicely, I'll post a pic when they have dried.

I've stripped the front serivce door with good ol Nitromors.

I was going to add some extra holes to a couple of CP that I have turning one into a 2L8B and a 2L10B but got playing Garou and that plan sort of went out of the window.

Finally theres been a bit of a set back, I sent the transformer to Franco as he very kindly offered to look at it for me, thanks again mate :awe: as it turns out it's not been tampered with but its not capable of outputting 17v for sound so it's not a suitable Naomi Uni transformer which is a a bit of a bummer but hopefully Mo will have what I need so I live in hope.
User avatar
FrancoB
J+ member of the year finalist!
Posts: 4796
Joined: June 8th, 2009, 10:42 pm
Location: Oxfordshire
eBay: francosquashking
Initials: FRN

Re: Sega Naomi restoration work in progress Updated Wed 20/6

Post by FrancoB »

You're more than welcome mate, it's just a shame we couldn't sort it for you :cry:

It looks like mo sold you a Naomi with a transformer from another cab. Does anyone know what this could be from? I'm guessing it's something non Naomi as it doesn't output 17v.

Image
User avatar
kevin2me
Posts: 87
Joined: May 1st, 2011, 4:48 pm
Location: Cork, Ireland
eBay: kevin2me2

Re: Sega Naomi restoration work in progress Updated Wed 20/6

Post by kevin2me »

Hey Guys,
Couldnt fine nada on Google for the 560-5422uk rev 1, I checked my model 2 cabs, and they are 18.5v.
And below is my Naomi. Its a 560-5422uk and easily found on Naomi Online PDFs. 2 * 17v 2.1A INT
Hope ye get it sorted, Kev

Image
11 Cabs Arcade Room: 1 Vewlix, 2 AWSDs, 2 NNC, 1 Astro, 1 Naomi gun cab, 1 Taito Cocktail, Initial D/Outrun2SP and Sega Rally Twin.
seba
Please Continue...
Posts: 21
Joined: July 7th, 2012, 2:15 pm
Location:

Re: Sega Naomi restoration work in progress Updated Wed 20/6

Post by seba »

Hello,

I'm new here, because I got a Naomi cabinet from a friend who never found the time to restore it himself. This thread is an amazing help! Thank you very much.
One question though, Above the place where the instructions usually are, I have a huge number of large cigarette burns. The whole thing looks like a minefield. Any idea on how to clean that up? I think no cleaning product will do the job, I'll probably have to sandpaper it and fill it up with something, maybe simple putty will do the trick?
User avatar
Paulie
Opens wallet, moths fly out
Posts: 2599
Joined: September 28th, 2011, 5:43 pm
Location: East Ardsley, West Yorks
eBay: retro-paulie
Initials: PSG

Re: Sega Naomi restoration work in progress Updated Wed 20/6

Post by Paulie »

TBH I don't really know what you can do with that, I had some burns and I sanded and polished and I'm going to give it a go with retr0brite. But if they are very bad then you could try what I did but as you said you may need to also fill but I've no idea how that would turn out. Unfortunatley the monitor surround plastic is probably the hardest Naomi part to find, I don't know of anywhere that has one for sale. Do you have any pics of the area that you wish to repair?
User avatar
Spectre
By Spectre
Posts: 1694
Joined: January 22nd, 2009, 5:42 pm
Location: Suffolk, UK
eBay: spectre-uk
Initials: JIM

Re: Sega Naomi restoration work in progress Updated Wed 20/6

Post by Spectre »

Fag burns are damage to the plastic itself, so there is no way to completely "buff" them out. Smooth the area with some very fine grit sandpaper and then respray the whole part appliance white.
User avatar
supergoose
Please Continue...
Posts: 737
Joined: September 12th, 2010, 10:38 pm
Location: Raccoon City, Germany

Re: Sega Naomi restoration work in progress Updated Wed 20/6

Post by supergoose »

This really makes me want to get a naomi, but that would mean that i'd have to get rid of the candy 18.
Wanted: SNK Candy 18 spares. Mainly looking for a marquee holder & the "video games" sign.
User avatar
Paulie
Opens wallet, moths fly out
Posts: 2599
Joined: September 28th, 2011, 5:43 pm
Location: East Ardsley, West Yorks
eBay: retro-paulie
Initials: PSG

Re: Sega Naomi restoration work in progress Updated Wed 20/6

Post by Paulie »

I'd love a little candy 18, very nice looking cabs, I really like the mini cabs. Thom was selling 2 as a pair a few weeks ago but sadly the timing wasn't great for me otherwise I would have been all over them.
User avatar
Paulie
Opens wallet, moths fly out
Posts: 2599
Joined: September 28th, 2011, 5:43 pm
Location: East Ardsley, West Yorks
eBay: retro-paulie
Initials: PSG

Re: Sega Naomi restoration work in progress Updated Wed 20/6

Post by Paulie »

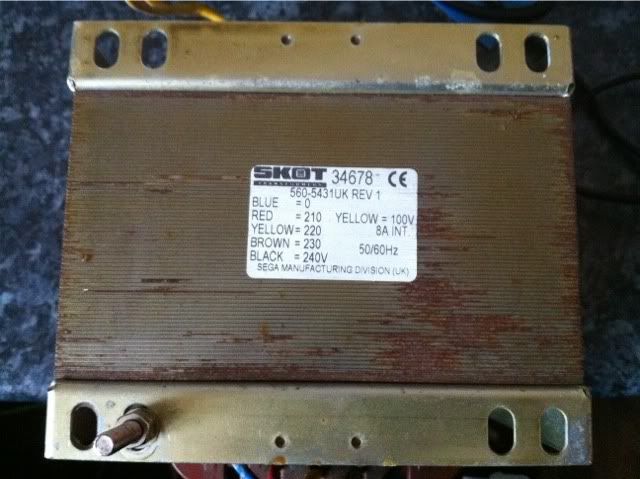
A replacement transformer is being shipped to me today so fingers crossed it arrives safe and sound within the next few days.

I got a cracking NNC CP from crunchy the other week :awe: and I also picked up a couple of spare 2L6B control panels a little while ago. I got one from Thom and Ralph was very kind (as always) and gave me one for free along with a ton of Naomi wiring.

I wanted to make a 2L10B for when I hook up my Atomiswave and a 2L8B but I've made a small FUBAR!

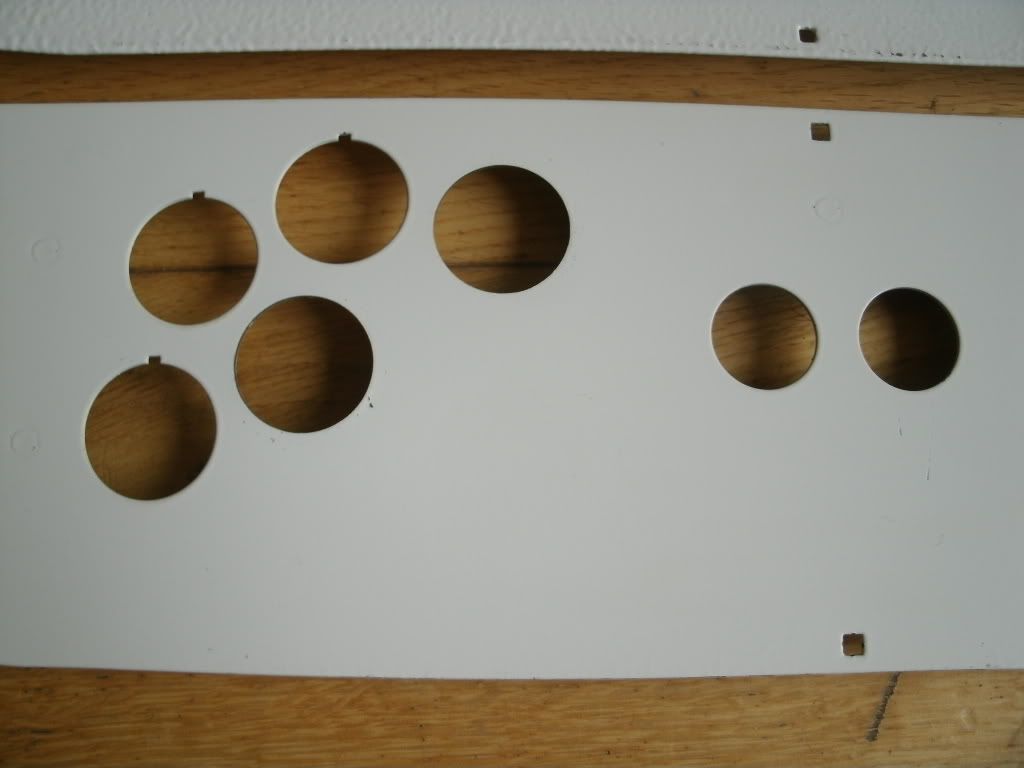
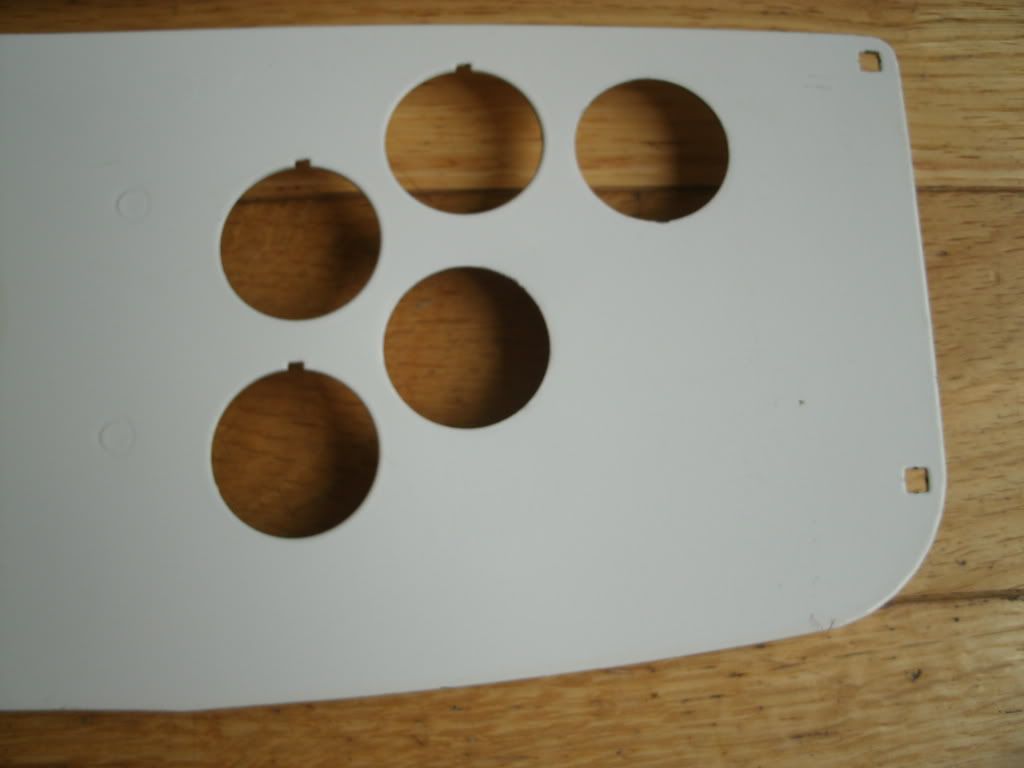
I put a couple of extra holes in one panel a couple of days ago to make a 2L8B panel. Today I made a 2L10B. I've taken a couple of snaps to you can see how I did it. Now here comes the FUBAR, The other day I hadn't made a 2L8B pannel at all, I had made a 2L10B panel so now I've got two of em, can't beleive I'm such a bellend :palm: I supose it's not really a big deal as I can fill the extra holes with miliput or epoxy or summat but I could have sworn I only added 2 extra holes to the first one I did :oops: I think it's that pesky hole punching fairy thats krept into my garage and done it when I wasn't looking.

BTW Frannylicious (FrancoB) has made the perfect guide on how to punch holes so if I were you I'd follow that.

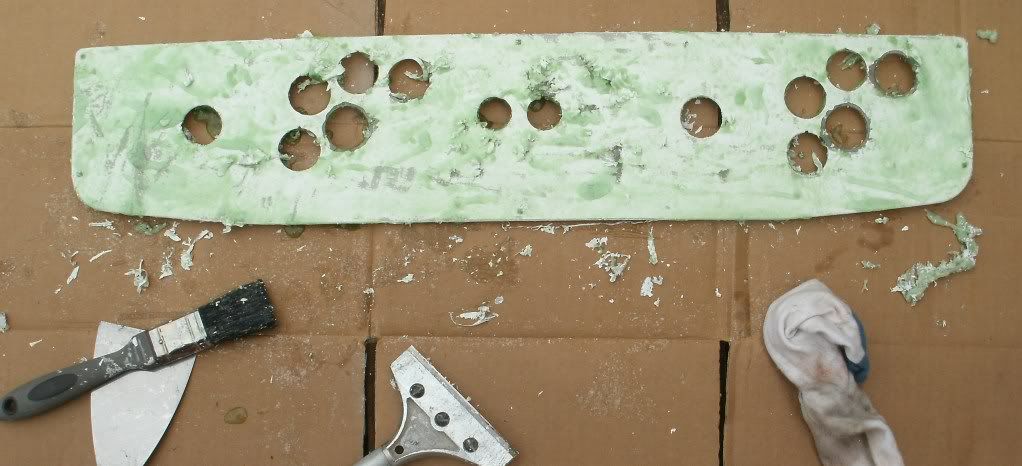
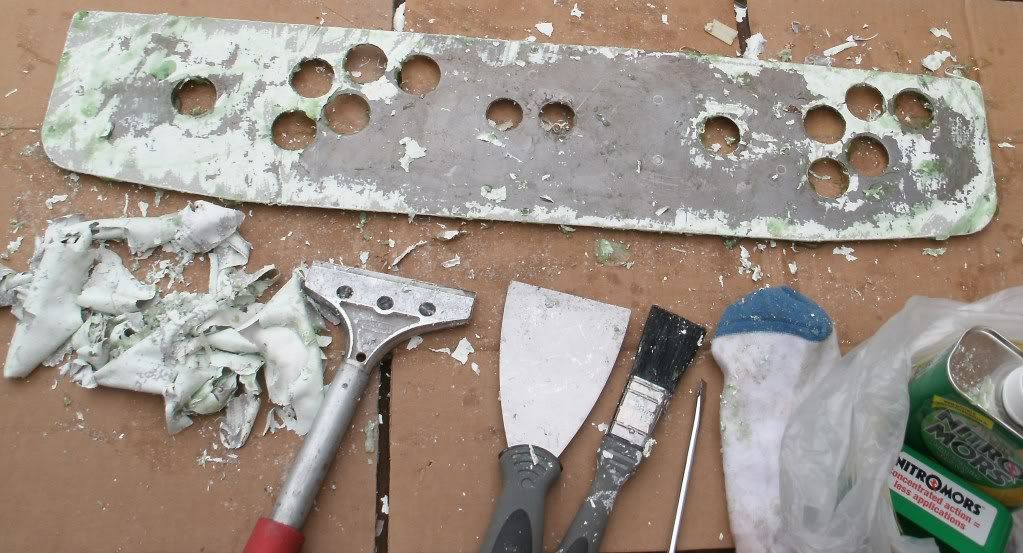
Anyway heres how I did it, BTW the paint has all chipped off this one pictured It's had the worst spray job ever it was like orange peel, very think and dimpled, the other CP had stock paint and didn't chip.
Mark your holes up and find the centre of the 30mm hole you wish to punch out, I used a centre punch but better still use a template, location rings and a predrilled centre guide, I didn't have the tackle to knock up that bit of kit but it still worked out ok, it's just if you do use that method then your button placement will be 100% perfect everytime.
Image

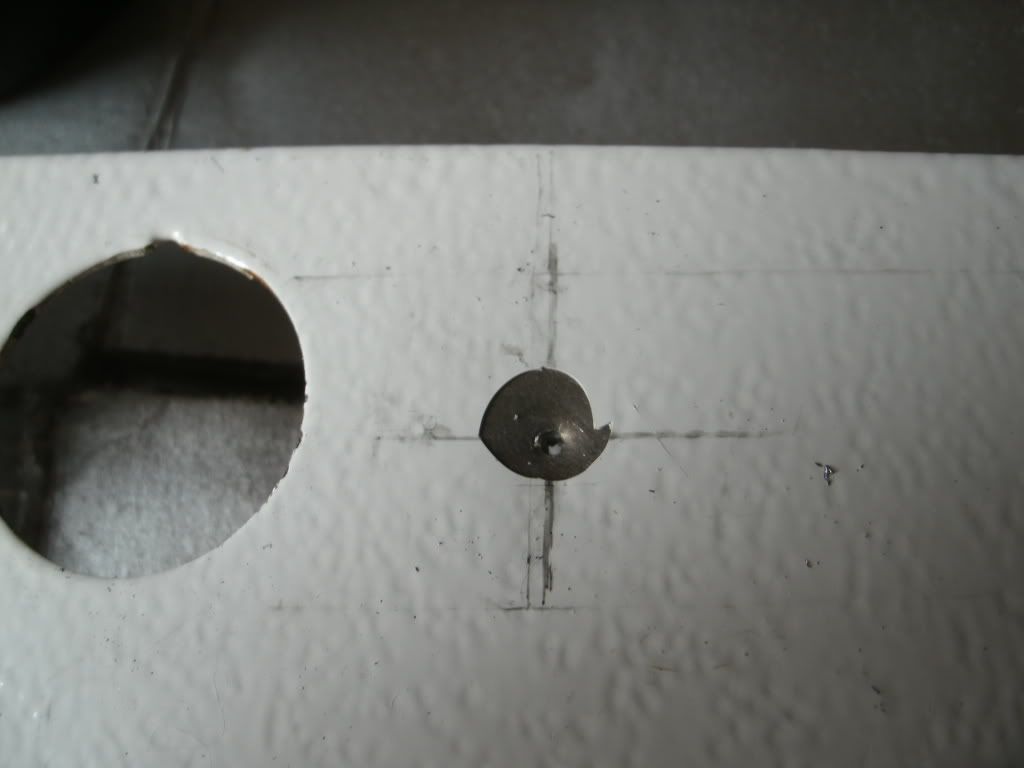
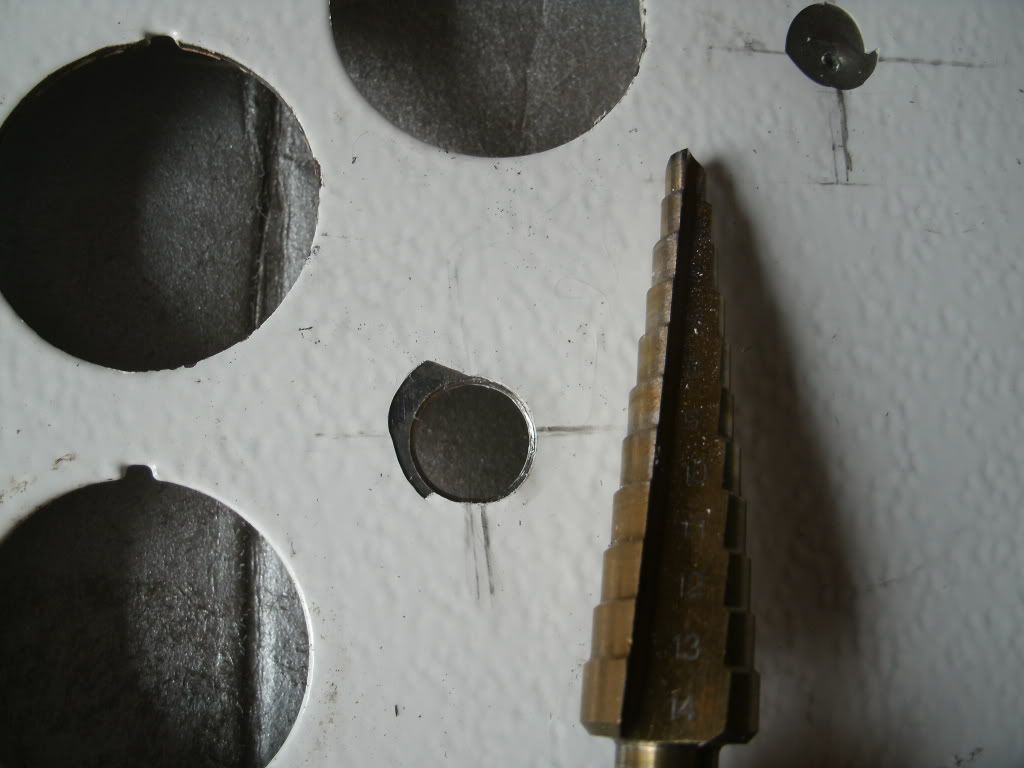
Drill a 10mm hole I used a step drill
Image

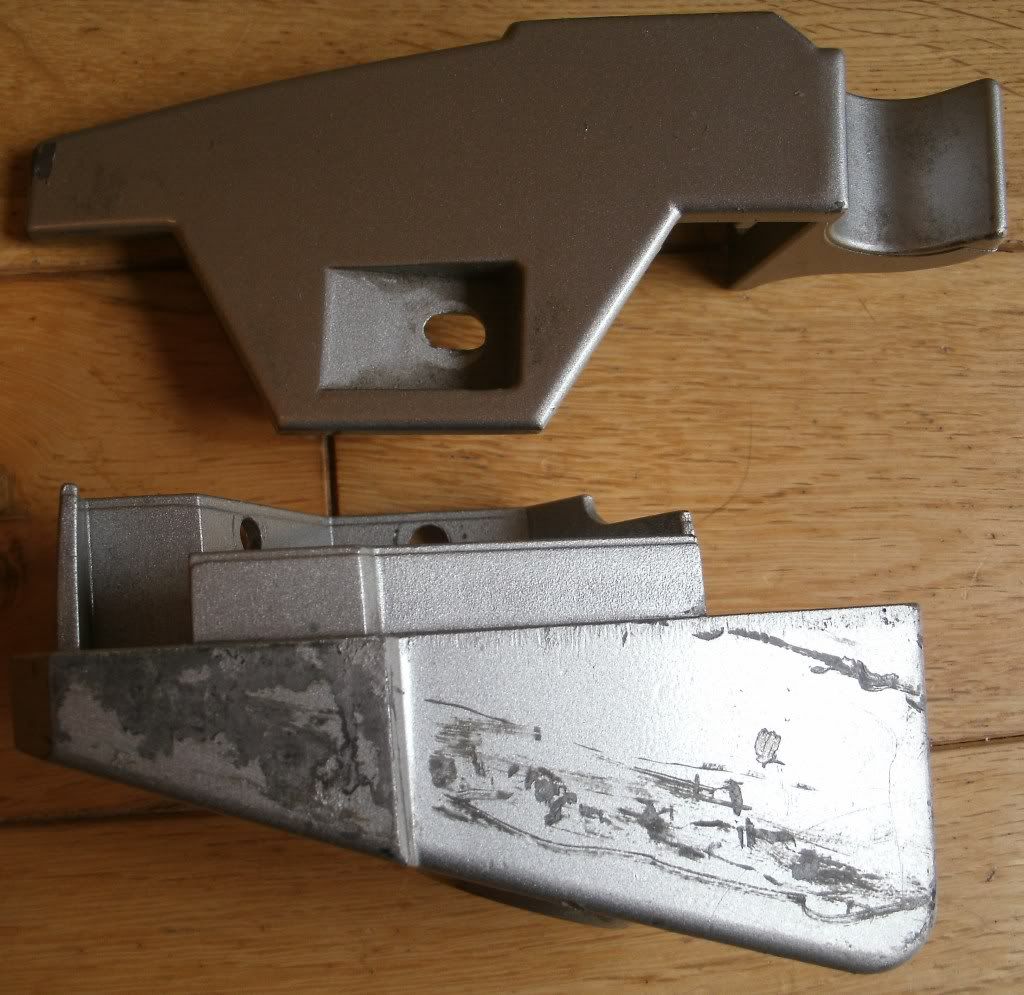
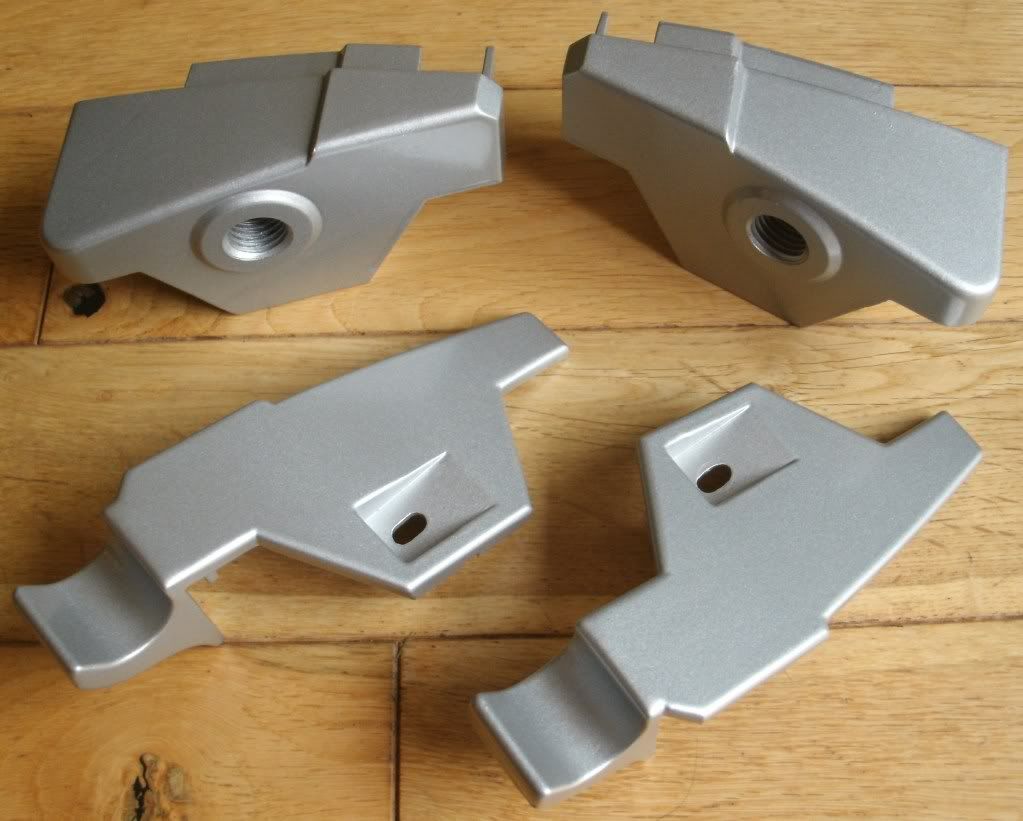
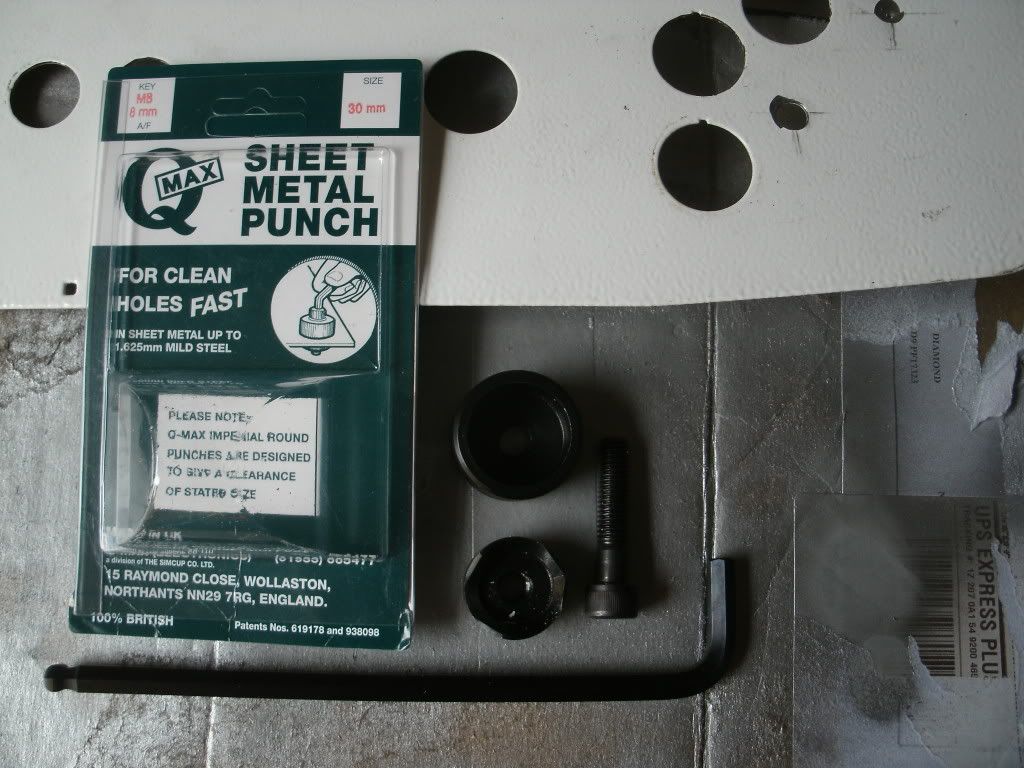
heres the punch I used
Image

fix it in position as so and use a 8mm IIRC allen key to turn the bolt
Image

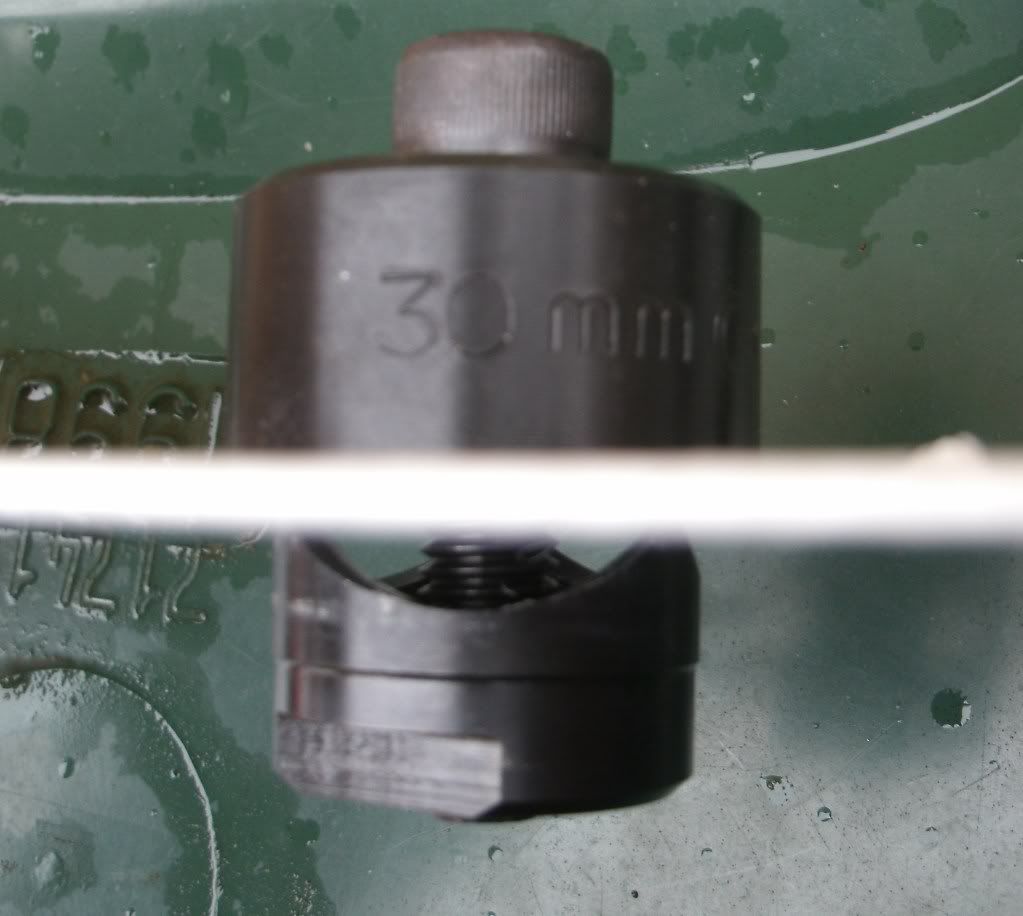
and it just pulls through
Image

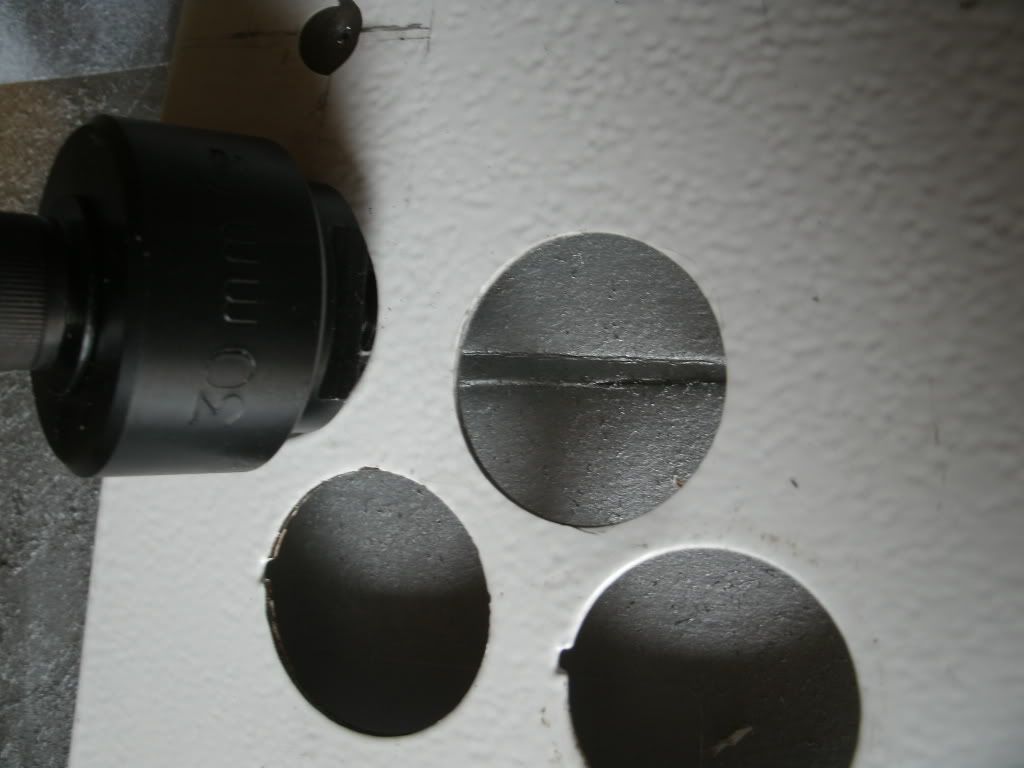
I just stuck some junk buttons in to see how they fit
Image

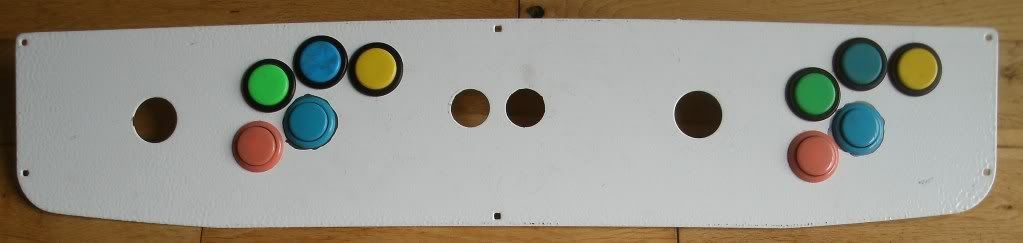
Now I need to work on the paintwork, the panel I got from Thom had the worst spray job ever it's like orange peel but I knew that when I bought it. Also I'm gonna have to fill the unwanted extra holes :palm: so I'll post some pics when I do that.

I have one NOS overlay I got from Craig that i'll use for the 2L8B, I may buy another one or have some custom Atomiswave art done for the 2L10B. I like stock but I thought the same art as on a proper Atomiswave panel might look good but I'm still not 100% decided.

I think I have all my 2P Naomi CP bases covered now (or will have when I fill the holes) as I'll have a:
2L6B with Naomi CPO,
2L8B with Naomi CPO,
2L10B with Naomi or Atomiswave CPO,
2L12B with NNC CPO.
User avatar
Paulie
Opens wallet, moths fly out
Posts: 2599
Joined: September 28th, 2011, 5:43 pm
Location: East Ardsley, West Yorks
eBay: retro-paulie
Initials: PSG

Re: Sega Naomi restoration work in progress Updated Tues 10/

Post by Paulie »

Feel free to mock :lol:

The twins :oops:
Image

A couple of pics so you can see just how nice and clean the holes are when using this method, as you can see the 3 holes with the notch at the top are the factory holes and the other 2 with out a notch are what I've added.
Image

Image

I still can't believe I did that :lol: but I'm really happy with the placement and how clean the holes came out. This is a nice little project for anyone with 'useless panels' as the punch is an absolute doddle to use as long as your 10mm pilot hole correctly positioned then you can't go wrong. BTW if your cp already has a CPO attached then you need your punch to pull through the CP face.

If you are looking to buy a punch get one from here (thats where I got mine) http://www.diytools.co.uk/q-max-sheet-m ... tml?q=30mm" punch (half the price of ebay in fact slightly under half the price when you factor in P&P and it's the same brand / identical punch. For Naomi you need 30mm and 24mm for the 1&2P, I picked up both sizes but not used the 24mm one yet.
User avatar
crunchywasp
stompin' an' jumpin'
Posts: 8101
Joined: February 10th, 2012, 2:51 pm
Location: Northern Ireland
eBay: crunchywasp
Initials: MAK

Re: Sega Naomi restoration work in progress Updated Tues 10/

Post by crunchywasp »

These hole punches do a really neat job - these look ace :awe: I'll definitely have to pick a couple up.

These hole punching fairies you mentioned are a right pain - We're lucky in that we don't get bothered by them north of the border - we just get hassle from those gnomes that tangle cables :awe:
Image
User avatar
Paulie
Opens wallet, moths fly out
Posts: 2599
Joined: September 28th, 2011, 5:43 pm
Location: East Ardsley, West Yorks
eBay: retro-paulie
Initials: PSG

Re: Sega Naomi restoration work in progress Updated Tues 10/

Post by Paulie »

crunchywasp wrote:These hole punching fairies you mentioned are a right pain - We're lucky in that we don't get bothered by them north of the border - we just get hassle from those gnomes that tangle cables :awe:
So that's who it is. Those little cable tangleing **** get everywhere :lol:
User avatar
crunchywasp
stompin' an' jumpin'
Posts: 8101
Joined: February 10th, 2012, 2:51 pm
Location: Northern Ireland
eBay: crunchywasp
Initials: MAK

Re: Sega Naomi restoration work in progress Updated Tues 10/

Post by crunchywasp »

I think they originated in the Highlands then migrated south over the years.

I wish they'd stuck to fishing :awe:

:spam:
Image
User avatar
AeroCityMayor
Previously alien_mame
Posts: 2005
Joined: July 25th, 2009, 1:05 pm
Location: West Yorks, UK
eBay: air_fortless
Initials: ACM

Re: Sega Naomi restoration work in progress Updated Tues 10/

Post by AeroCityMayor »

Well done matey - I didn't have the cajones to do it so I sold hole punch (same one you got) and finally managed to give the panel away :awe:

I couldn't work out how to stop the drill bit skating all over the place when drilling out the 3mm pilot hole for the 10mm hole for the arbour :/

That's damned near, if not actually, perfect work d00d. 8-)

Cheers buddy,

Ralph.

*** EDIT *** You shouldn't have counted your thumbs for the 2L8B :lol: :lol: :lol:
Image
User avatar
Paulie
Opens wallet, moths fly out
Posts: 2599
Joined: September 28th, 2011, 5:43 pm
Location: East Ardsley, West Yorks
eBay: retro-paulie
Initials: PSG

Re: Sega Naomi restoration work in progress Updated Tues 10/

Post by Paulie »

crunchywasp wrote:I wish they'd stuck to fishing :awe:

:spam:
Me too :lol:
alienmame wrote:Well done matey - I didn't have the cajones to do it so I sold hole punch (same one you got) and finally managed to give the panel away :awe:
Cheers d00d, it was a very welcome gift and as you can see it's gone to a good home :D
alienmame wrote:I couldn't work out how to stop the drill bit skating all over the place when drilling out the 3mm pilot hole for the 10mm hole for the arbour :/
Theres 2 way to stop it skating one is to make a template and use a pattern or maybe a predrilled bit of wood clamped in place this is what francoB did and it's perfect everytime, or 2 is to use a center punch, if you don't have one you can use a screw or a nail, this gives you a small hole/ indentation and the bit will then bite where you want it to bite, but you have to be very acurate with your measurements otherwise it's a surefire fubar in the making.
alienmame wrote:That's damned near, if not actually, perfect work d00d. 8-)

Aye it's not bad at all :D
alienmame wrote:*** EDIT *** You shouldn't have counted your thumbs for the 2L8B :lol: :lol: :lol:
:palm: :lol: :lol: :lol:

Well I'm going to fix the extra hole with some epoxy and a nice washer as thats what I have to hand, so it should be fine when it's done. Just waiting for the Nitro to strip the million layres of orange peel off the panel I got from Thom.
User avatar
IDCHAPPY
c***3
Posts: 2609
Joined: May 3rd, 2010, 7:25 pm
Location: Edinburgh
eBay: Arcadedreams2013
Initials: IDC

Re: Sega Naomi restoration work in progress Updated Tues 10/

Post by IDCHAPPY »

You got 2 for the price of 2 mate :lol:
User avatar
Paulie
Opens wallet, moths fly out
Posts: 2599
Joined: September 28th, 2011, 5:43 pm
Location: East Ardsley, West Yorks
eBay: retro-paulie
Initials: PSG

Re: Sega Naomi restoration work in progress Updated Tues 10/

Post by Paulie »

:lol:

Notromors doing it's thang
Image

New improved formula :think:

:yawn: still doing it's thang
Image
Last edited by Paulie on July 10th, 2012, 7:53 pm, edited 1 time in total.
User avatar
Paulie
Opens wallet, moths fly out
Posts: 2599
Joined: September 28th, 2011, 5:43 pm
Location: East Ardsley, West Yorks
eBay: retro-paulie
Initials: PSG

Re: Sega Naomi restoration work in progress Updated Tues 10/

Post by Paulie »

Hoofs and leg hooks, I did these a week or so ago.

My cab only came with the LHS hook and hoof, I struggled to find some and sereval people said they had binned them cos they couldn't give em away. Anyway a big thanks to my buddy FrannyBee and Andy for helping me out with these missing parts. I had now had found a pair of each yay :D . As usual it was wet and dry, I used a courser grade to remove the heavier scrapes as much as I could (there is a light mark on one hoofs but it is very light and it's shows up more in the pic than in real life but it's not bad as that was pretty deep) then on to a finer grade and finally prime, spray and lacqur.

Before (I had already prepped 1 of each before I realised I hadn't taken a pic)
Image

After
Image