Candy's New Life - New Astro City Restauration
-
Paulie

- Opens wallet, moths fly out
- Posts: 2599
- Joined: September 28th, 2011, 5:43 pm
- Location: East Ardsley, West Yorks
- eBay: retro-paulie
- Initials: PSG
Re: Candy's New Life - New Astro City Restauration
You're doing a fantastic job ninn 

 Keep it comming.
-
ninn

- TheRedKnight's Lover
- Posts: 934
- Joined: September 5th, 2011, 1:24 pm
- Location: Vienna, Austria, Europe
- eBay: 8bitbitch
Re: Candy's New Life - New Astro City Restauration
Some weeks ago, I wanted to polish the metal bar at the bottom. I heard, that Aluminium foil and water would be enough to polish steel. That what I prepared.
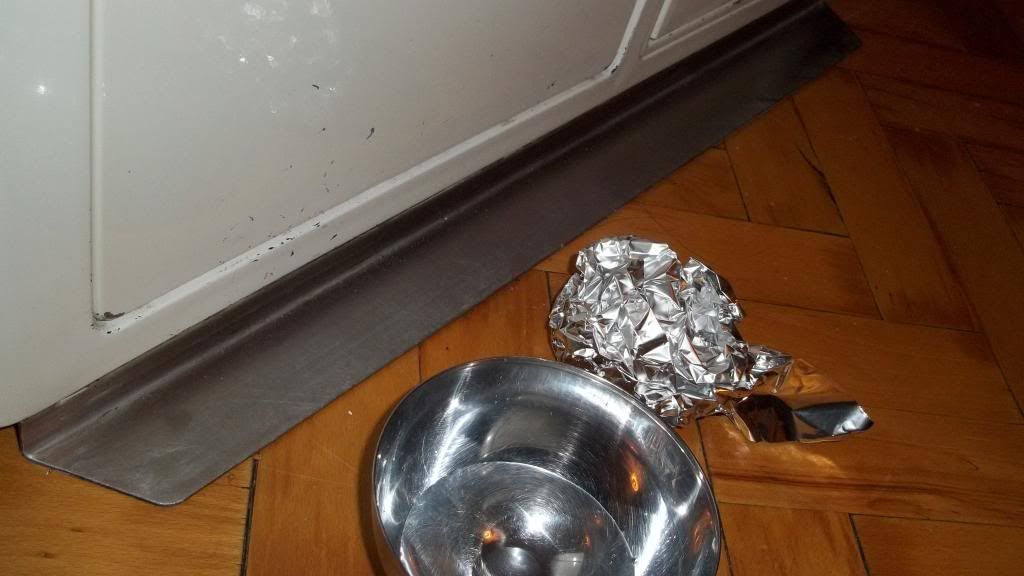
I did not work that great, but it got better and more shiny. I soon switched to some metal polish, which worked a little better, ...

... but it was still not able to remove the scratches in the metal. Thou, it became shiny.
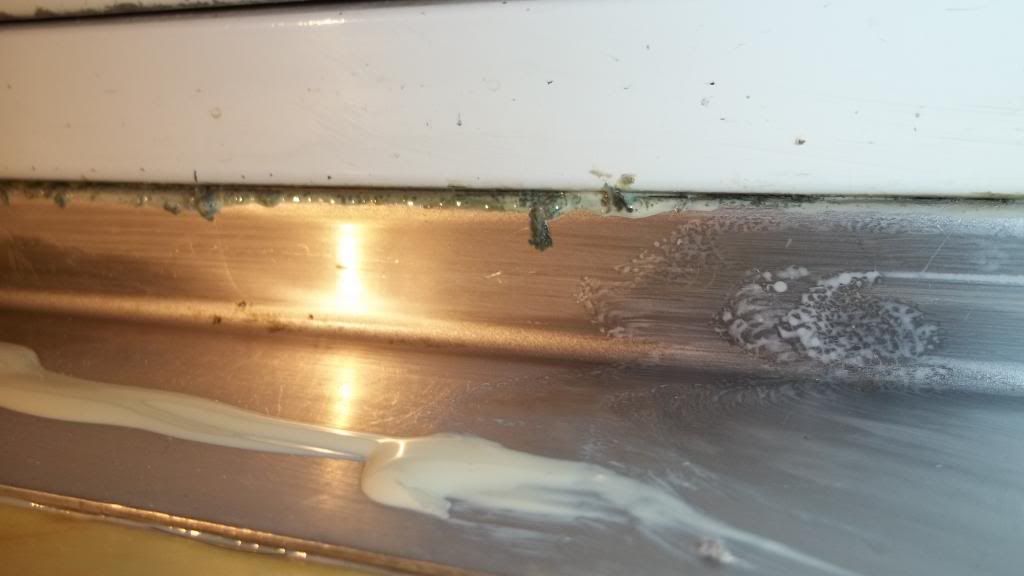
whatever was hiding in there, it was nasty and it was green.
anyway, the metal turned out good. Not perfectly polished, but at least it became shiny and I removed some hidden dirt.
As you can see, I will have to fix the paint on the front doors soon.
ninn
I did not work that great, but it got better and more shiny. I soon switched to some metal polish, which worked a little better, ...
... but it was still not able to remove the scratches in the metal. Thou, it became shiny.
Here it comes ... dirt from in between ...Paulie wrote:Keep it comming.
whatever was hiding in there, it was nasty and it was green.
anyway, the metal turned out good. Not perfectly polished, but at least it became shiny and I removed some hidden dirt.
As you can see, I will have to fix the paint on the front doors soon.
ninn
-
stickfans
- Posts: 5
- Joined: December 16th, 2012, 12:43 pm
- Location:
Re: Candy's New Life - New Astro City Restauration
It is tight! Nice work man!!
-
ninn
- TheRedKnight's Lover
- Posts: 934
- Joined: September 5th, 2011, 1:24 pm
- Location: Vienna, Austria, Europe
- eBay: 8bitbitch
Re: Candy's New Life - New Astro City Restauration
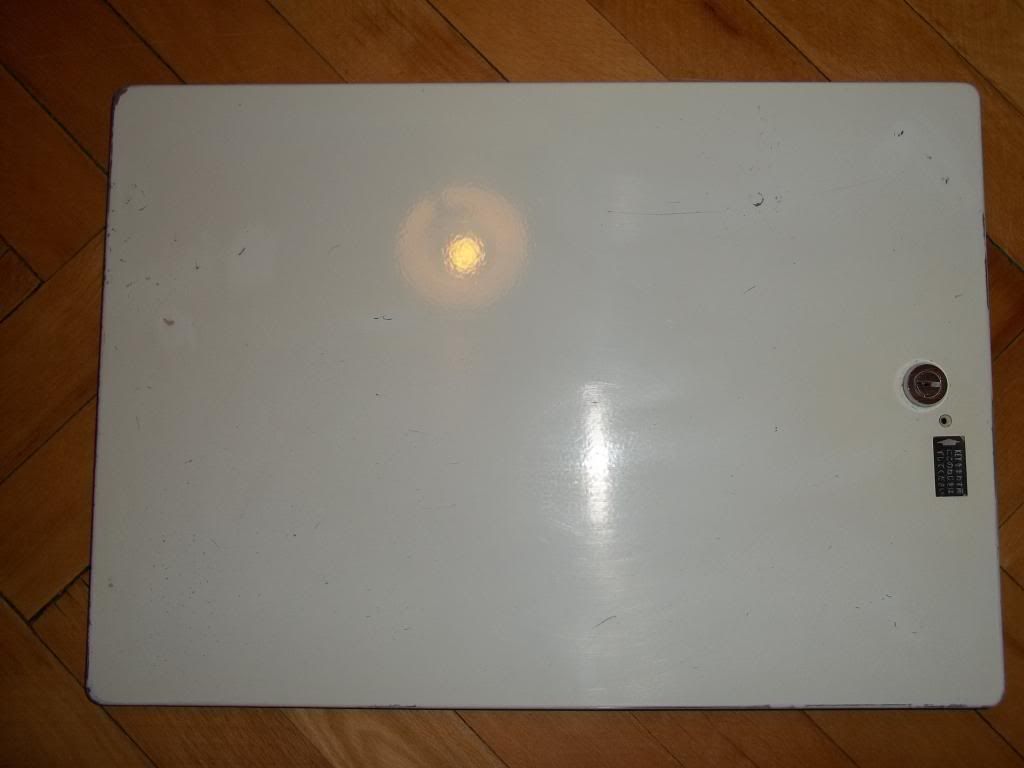
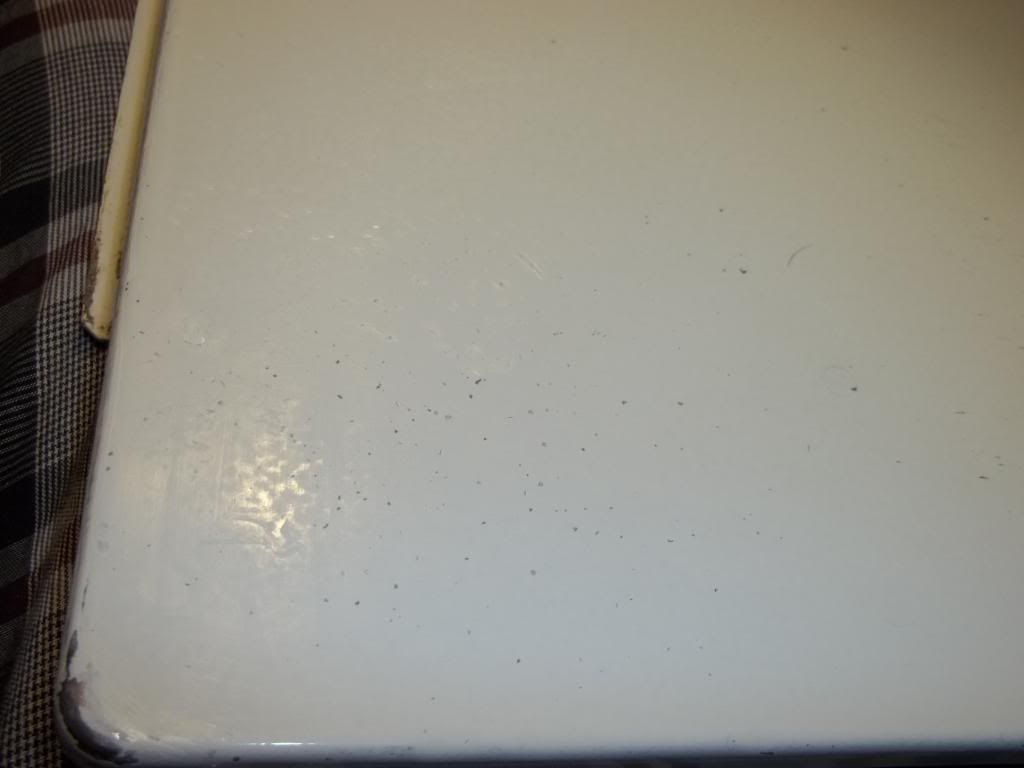
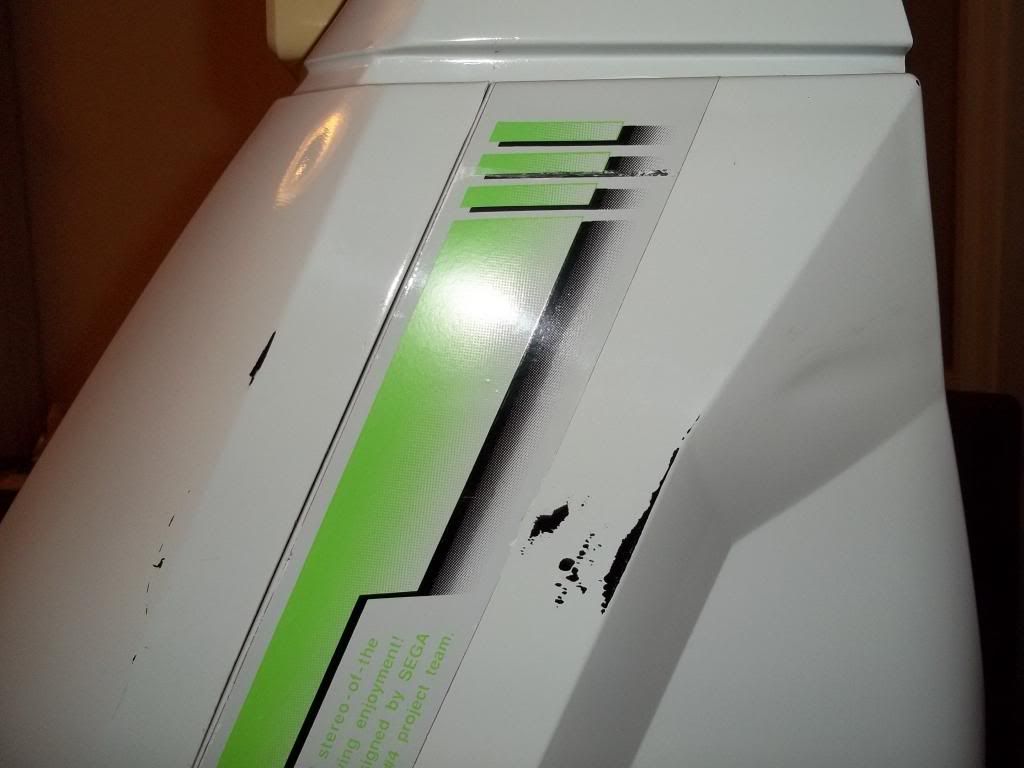
I fixed the last scratched parts: The service doors on the front.
Lets have a look at the nasty, original, cleaned state:


As you can see, lots and lots of scratches and chipped of paint. hard to see on those totals.
Seems like the door that hides the coin bucket has been used the most, don't know why.
Ok, here you can see my process. A very tidious process.
First: Sand down the problematic zones. This is very hard to do, since most of the scratches are below 1mm and i did not want to hurt the surrounding areas too much.
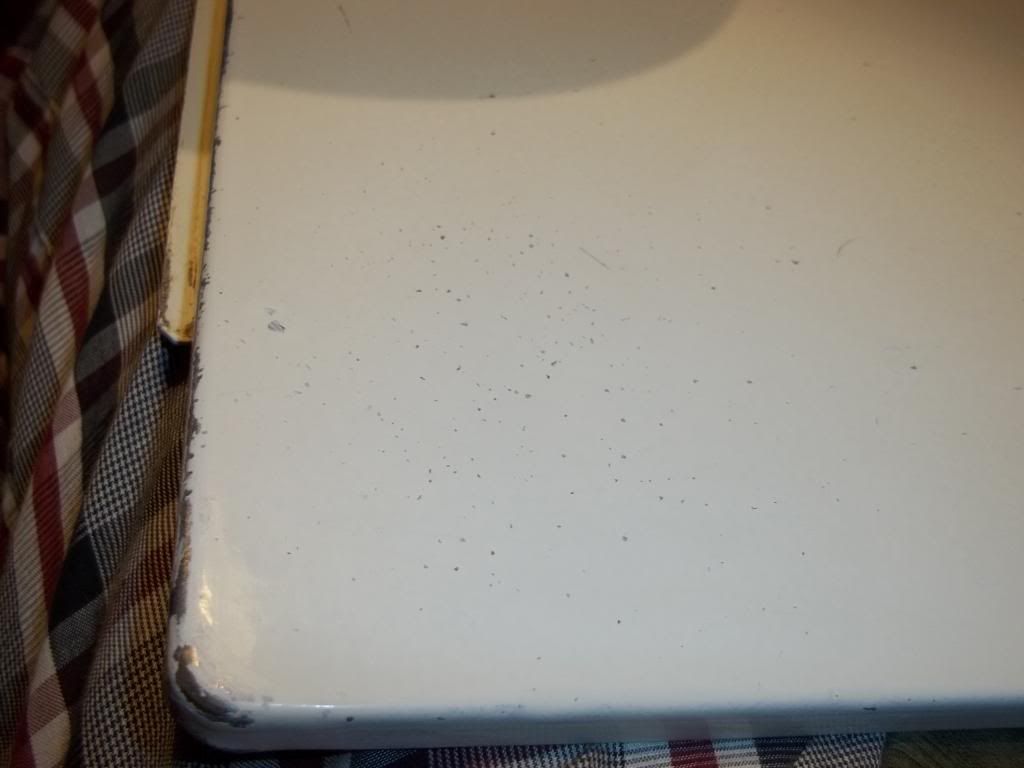
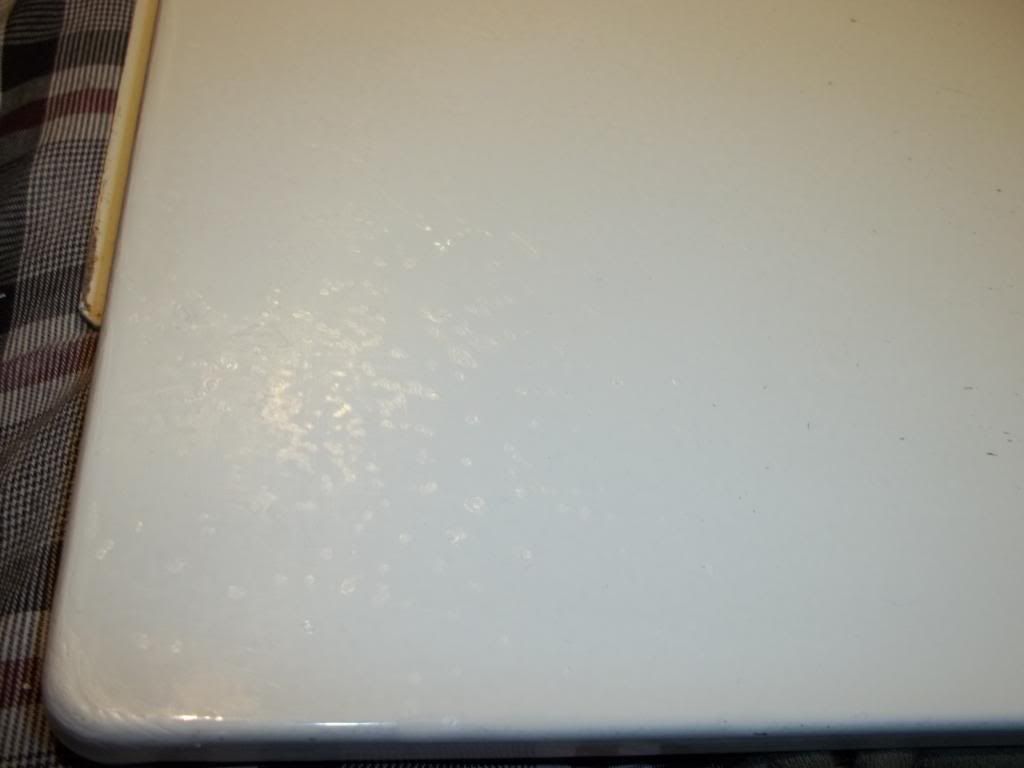
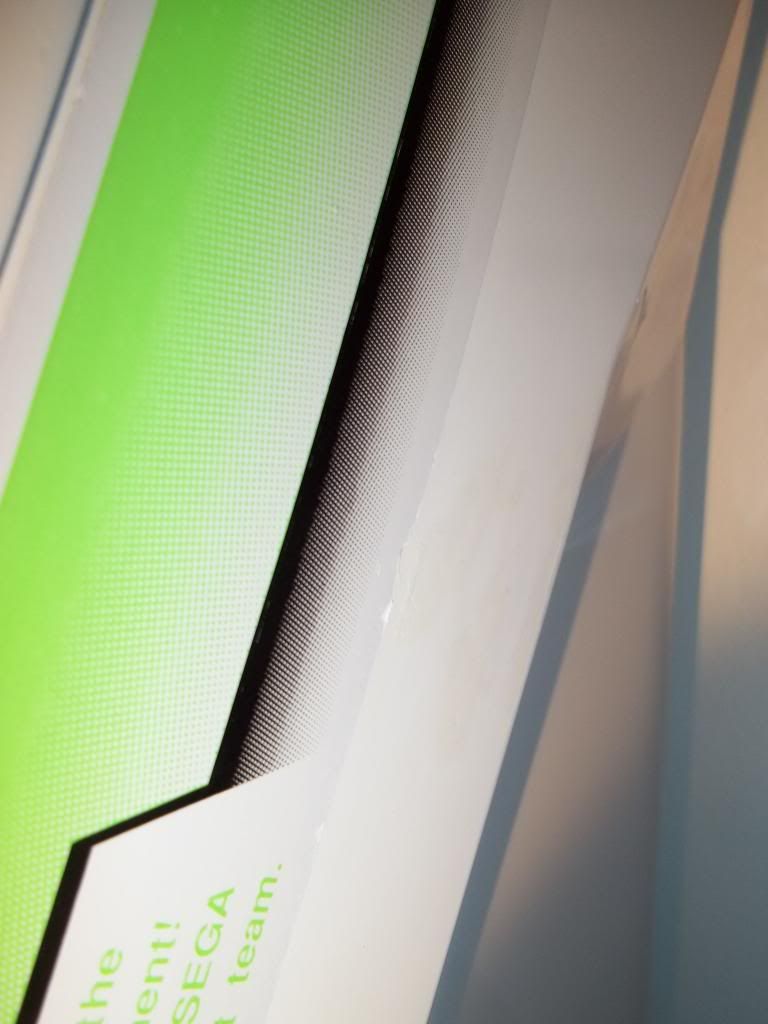
Here you can see what the paint looks like - lots of chipped of paint.
In this picture, I already worked half way down with my paint. I used the smallest brush i own, just to add a mini dot of paint into the scratch. After some time, i rubbed that wet color off with wet kitchen paper or my fingers. Most of the time this ment that I had to paint over it again. And again, and again. basicly filling the scratch with new paint. Did I say it was tidious work?
nearly done. I am happy with the paint now. Used the reflection to show you the new paint. As you can see, the color of the new paint blends very nice with the original paint. let's let it dry.
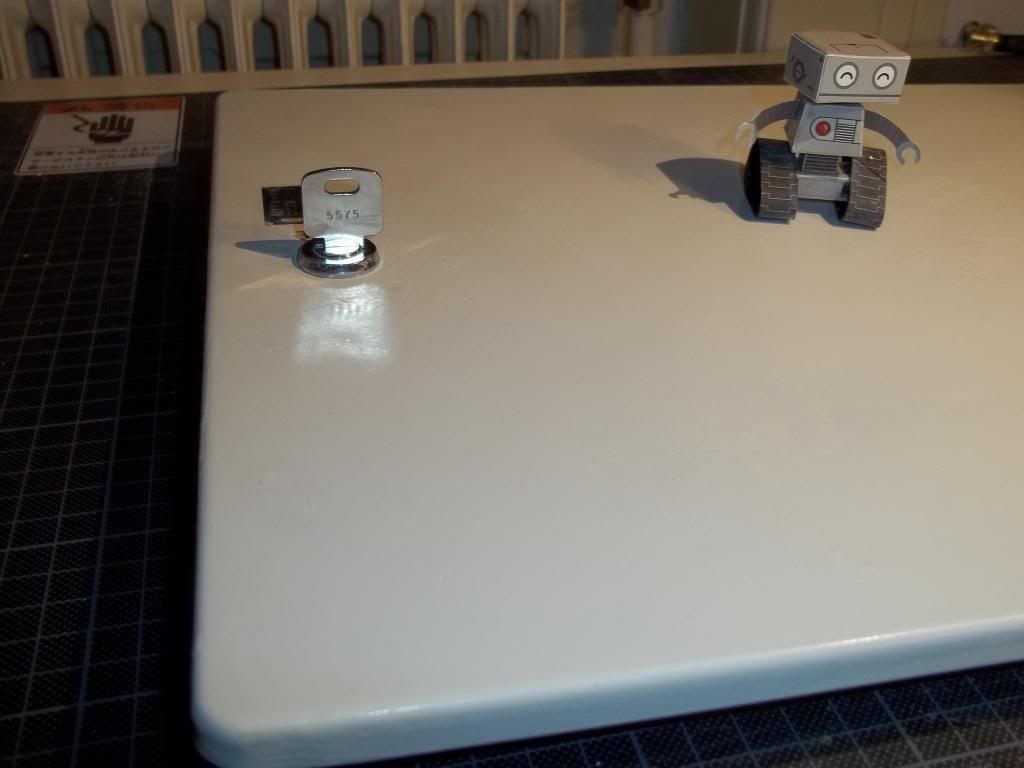
After some time, I used T-Cut and some fine sand paper to get a smooth surface.
You can see my cleanning-up-unit happily helping smoothing the surface with its all-terrain treads.
On one part, i used too much t-cut, and rubbed off good paint. this is not good, and this must not happen again. but i can understand that no paint can withstand several sandings without vanishing into thin air. I guess I am the only one seeing it, thou
So...
I did this process on all doors and frames. Even on the inside of some doors.
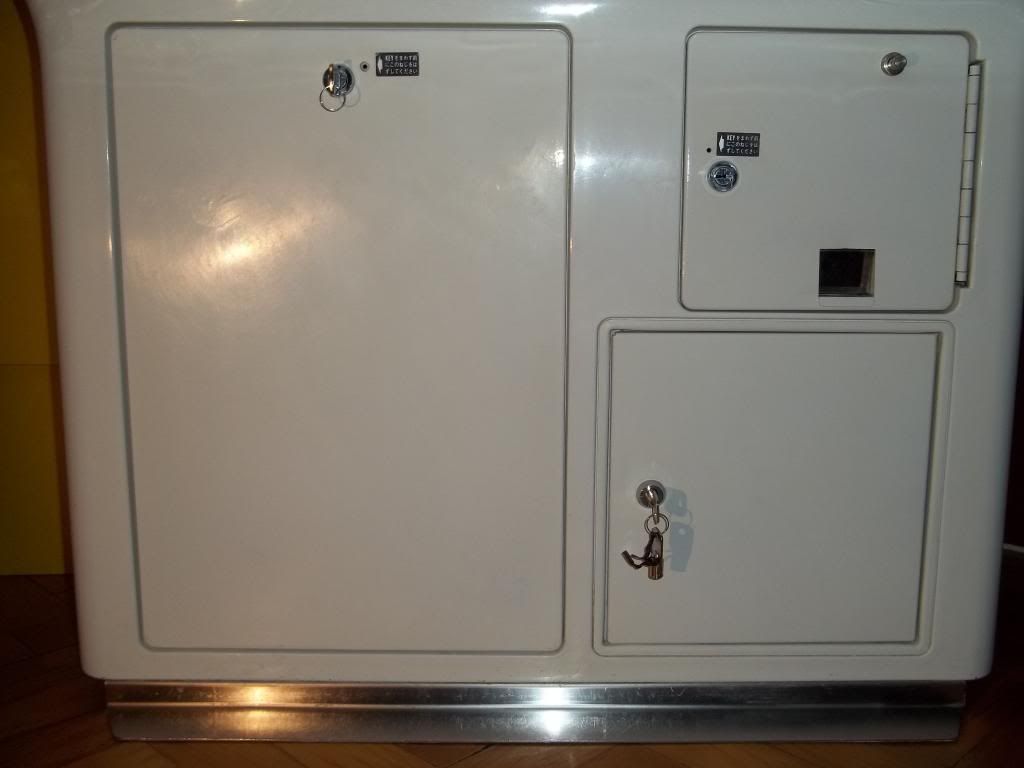
Turned out very clean!!!
Makes a world of a difference, not to see that scratchy surface in front of the cab any more!
With the same technique i removed the biggest and worst of all my scatches: The one wound that was done with the carry belts. Lets recall that easy to spot wound on its side:
and after the treatment:
My cab is basicly scratchfree now.
It is not a perfect repair, but my corrections work on the first and second look.
You can't spot them, if you dont know they were there, and just see them if you have a very close look with good light.
And after severy treatments with sandpaper, caterpillar tracks and t-cut, the color fits a lot better to the - most of the discolorisation is gone! AND - thats very important to me - all original stickers are still attached and were not damaged in the process.
ninn, happy.
Lets have a look at the nasty, original, cleaned state:
As you can see, lots and lots of scratches and chipped of paint. hard to see on those totals.
Seems like the door that hides the coin bucket has been used the most, don't know why.
Ok, here you can see my process. A very tidious process.
First: Sand down the problematic zones. This is very hard to do, since most of the scratches are below 1mm and i did not want to hurt the surrounding areas too much.
Here you can see what the paint looks like - lots of chipped of paint.
In this picture, I already worked half way down with my paint. I used the smallest brush i own, just to add a mini dot of paint into the scratch. After some time, i rubbed that wet color off with wet kitchen paper or my fingers. Most of the time this ment that I had to paint over it again. And again, and again. basicly filling the scratch with new paint. Did I say it was tidious work?
nearly done. I am happy with the paint now. Used the reflection to show you the new paint. As you can see, the color of the new paint blends very nice with the original paint. let's let it dry.
After some time, I used T-Cut and some fine sand paper to get a smooth surface.
You can see my cleanning-up-unit happily helping smoothing the surface with its all-terrain treads.
On one part, i used too much t-cut, and rubbed off good paint. this is not good, and this must not happen again. but i can understand that no paint can withstand several sandings without vanishing into thin air. I guess I am the only one seeing it, thou
So...
I did this process on all doors and frames. Even on the inside of some doors.
Turned out very clean!!!
Makes a world of a difference, not to see that scratchy surface in front of the cab any more!
With the same technique i removed the biggest and worst of all my scatches: The one wound that was done with the carry belts. Lets recall that easy to spot wound on its side:
and after the treatment:
My cab is basicly scratchfree now.
It is not a perfect repair, but my corrections work on the first and second look.
You can't spot them, if you dont know they were there, and just see them if you have a very close look with good light.
And after severy treatments with sandpaper, caterpillar tracks and t-cut, the color fits a lot better to the - most of the discolorisation is gone! AND - thats very important to me - all original stickers are still attached and were not damaged in the process.
ninn, happy.
-
moshpit
- Fantasy Zone Finder
- Posts: 1027
- Joined: February 19th, 2009, 9:26 pm
- Location: Germany
- Initials: RON
Re: Candy's New Life - New Astro City Restauration
Dude, seriously some marvellous job you've done there!
WARNING! A HUGE BATTLESHIP IS APPROACHING FAST!
-
crunchywasp

- stompin' an' jumpin'
- Posts: 8104
- Joined: February 10th, 2012, 2:51 pm
- Location: Northern Ireland
- eBay: crunchywasp
- Initials: MAK

-
emphatic

- Breastfeeds when required
- Posts: 5909
- Joined: April 7th, 2009, 4:14 pm
- Location: Alingsås, Sweden
- eBay: jorgen_sjolander
- Initials: JOR
-
Svovl

- Posts: 223
- Joined: September 6th, 2012, 7:46 am
- Location: Denmark
- eBay: clemensnk
- Initials: CNK
-
TadCool

- 'Slayer'
- Posts: 1080
- Joined: February 14th, 2010, 3:00 pm
- Location: Japan, Chiba
- eBay: Daicombo
- Initials: RAF
-
Paulie
- Opens wallet, moths fly out
- Posts: 2599
- Joined: September 28th, 2011, 5:43 pm
- Location: East Ardsley, West Yorks
- eBay: retro-paulie
- Initials: PSG
Re: Candy's New Life - New Astro City Restauration
Awesome work, yer doing a grand job mate 
-
Softdrink

- Please Continue...
- Posts: 28
- Joined: November 22nd, 2012, 2:29 am
- Location: University of California Los Angeles
- Initials: SFT
Re: Candy's New Life - New Astro City Restauration
Awesome stuff here!
-
ninn
- TheRedKnight's Lover
- Posts: 934
- Joined: September 5th, 2011, 1:24 pm
- Location: Vienna, Austria, Europe
- eBay: 8bitbitch
Re: Candy's New Life - New Astro City Restauration
Lets crown my beauty! 
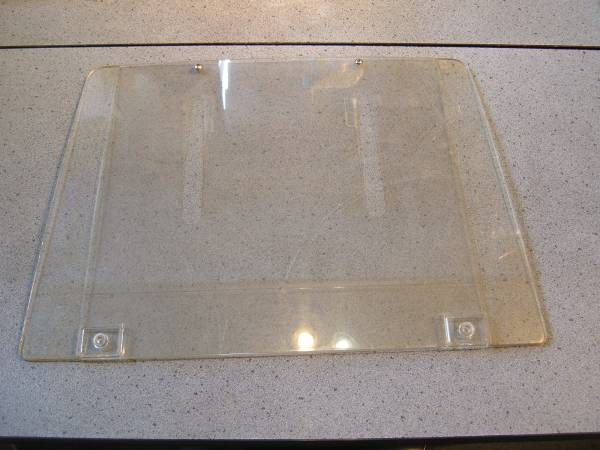
On the internets, I stumbled upons what looked like a Astro City Marquee.
10 days later, I got a acryl encrusted with dirt, stain and adhesive tape.
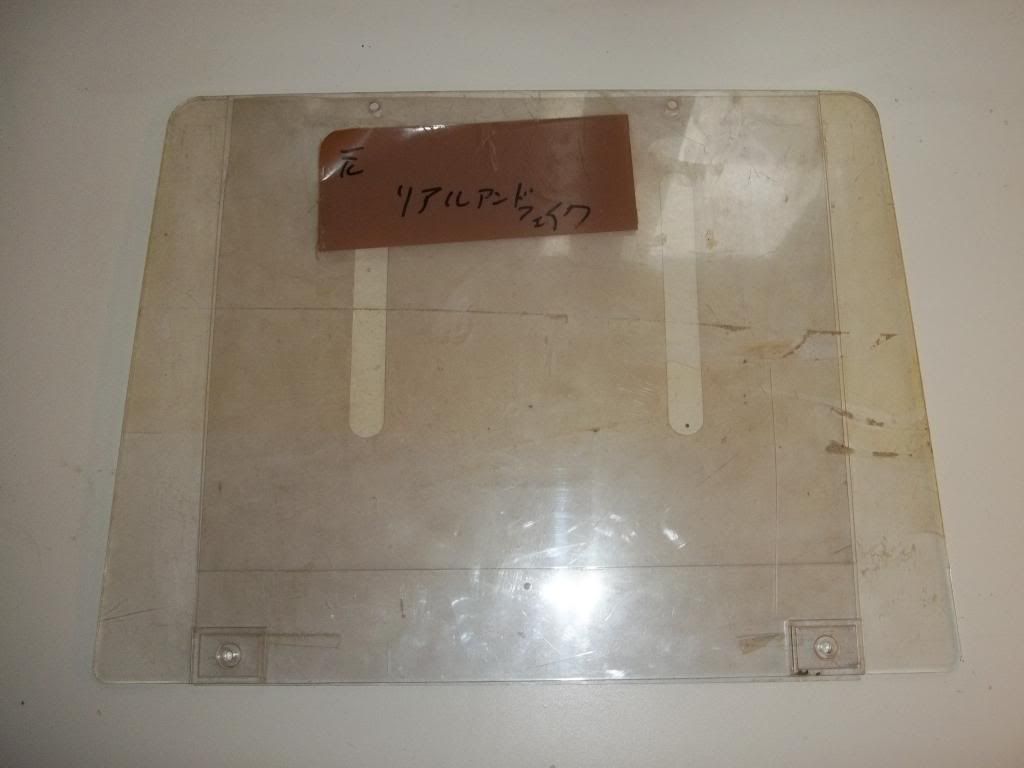
The Original Tape was especially nasty.
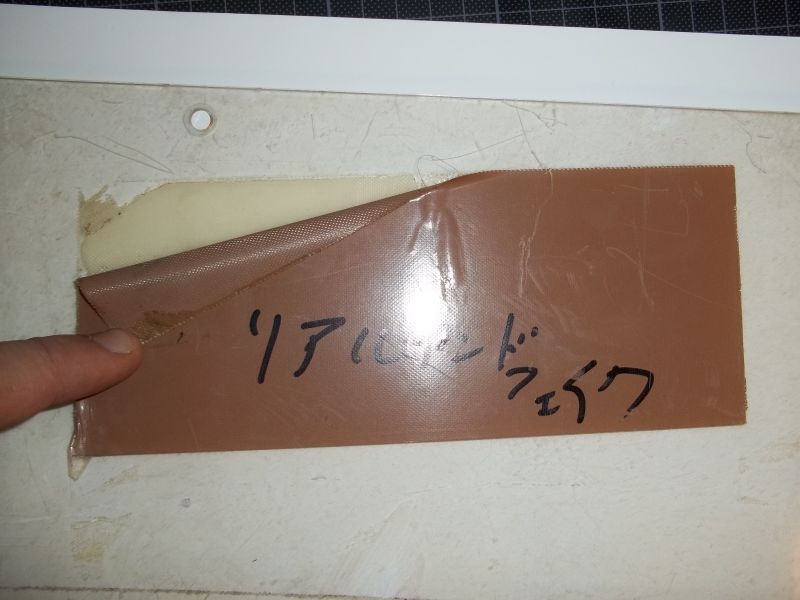
I was ****.
As If I didn't clean up enough stuff already.
Let's take this on.
First, I put it on a soft surface, and cleaned it with vinegar/soda-cleaner.
I used a blowdryer to get the tape off, and in a session I will never forget, I removed the sticker residue with goo-gone.
I had to do it several times, before I got most of the stain off.
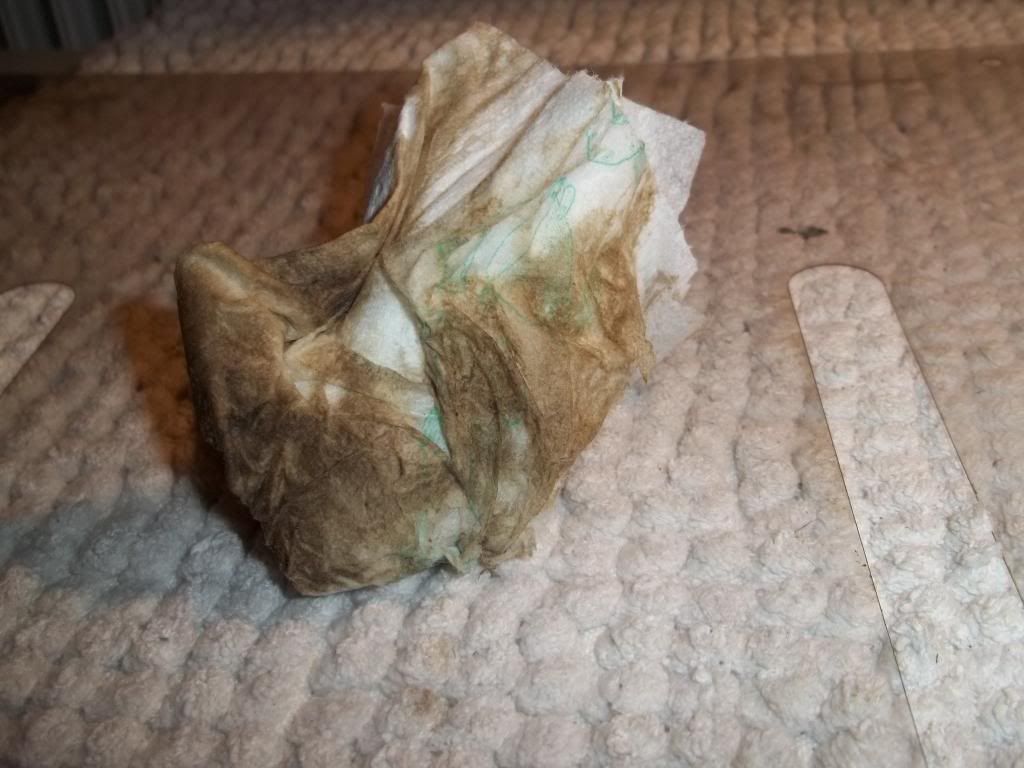
This took my about one hour. But I got rid of most of the stain.
But the old tape residue was especially cumbersome. They became polished in the process, and were alredy very hard and not sticky at all. Some more point-blank-sessions of goo-gone required.
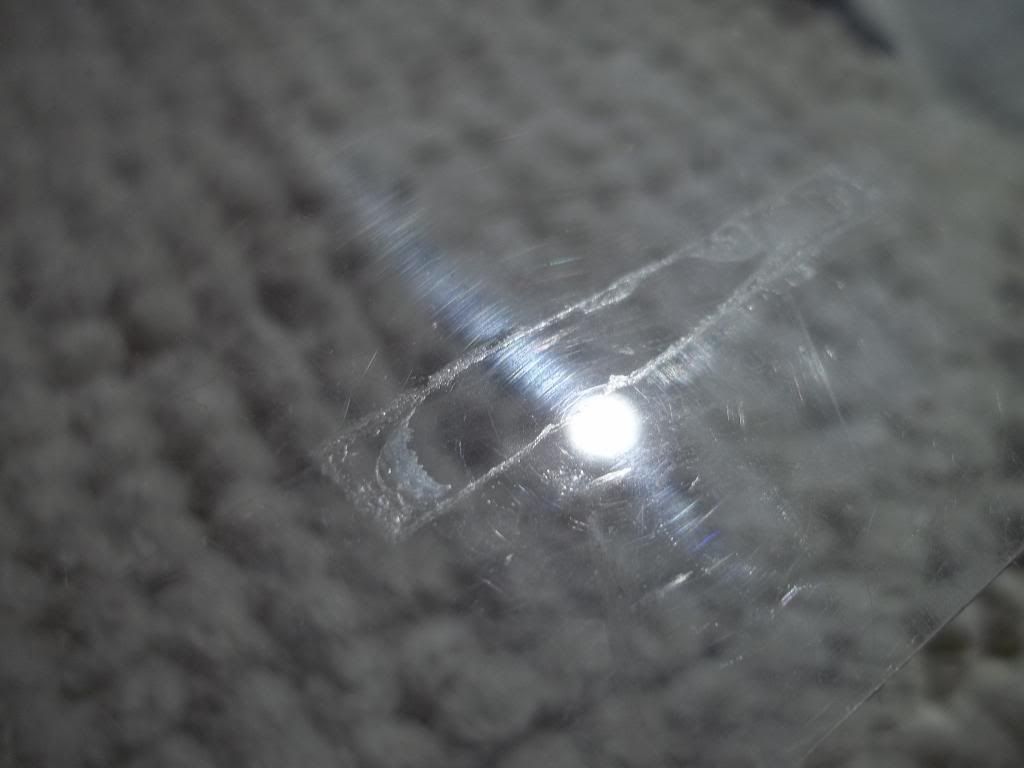
Some time later, it was nearly good. I chose to live with the scratches in the acrylic - since removing them would mean lots of sandpaper and electric buffing tools, which I don't have.And after all cleaning, it already looked good enough.
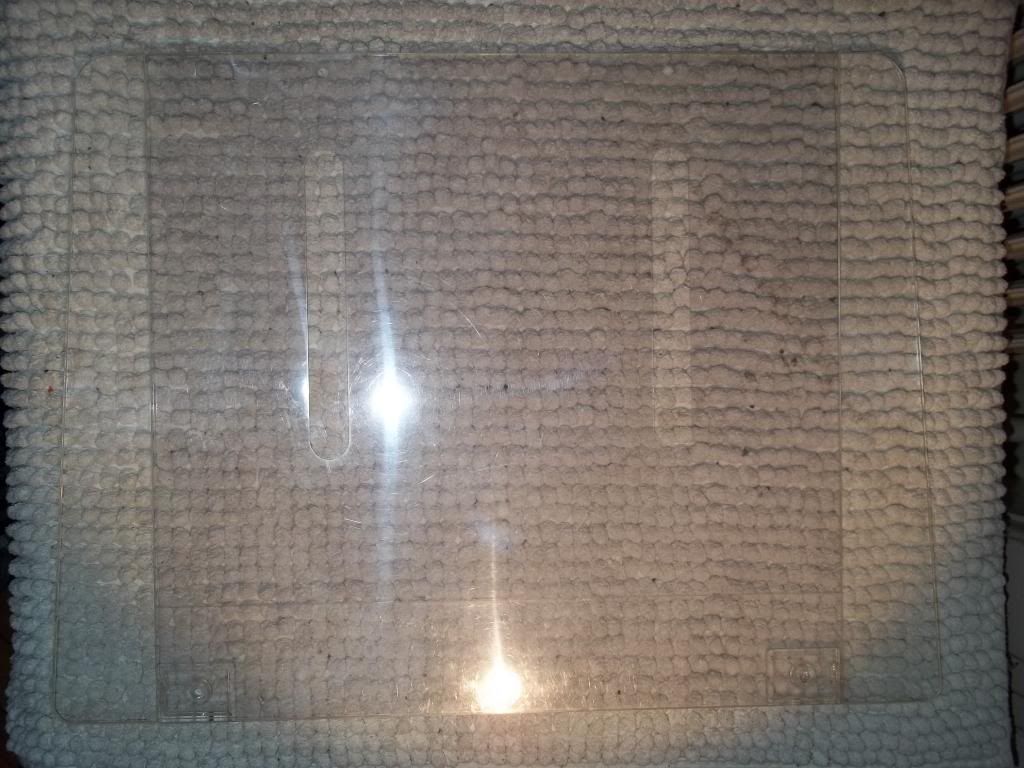
I looked for some screws to fix it on the cab, and some small screws and screw nuts to hold the two pieces together.
To my surprise, all of the screws I tried fitted perfectly - the screw holes on the back of the cab seems to take standard M4-Screws. Hooray!
Well ... using those standard screws, fixing it on the cab was easy as pie.
And that's how my Beauty looks right now:
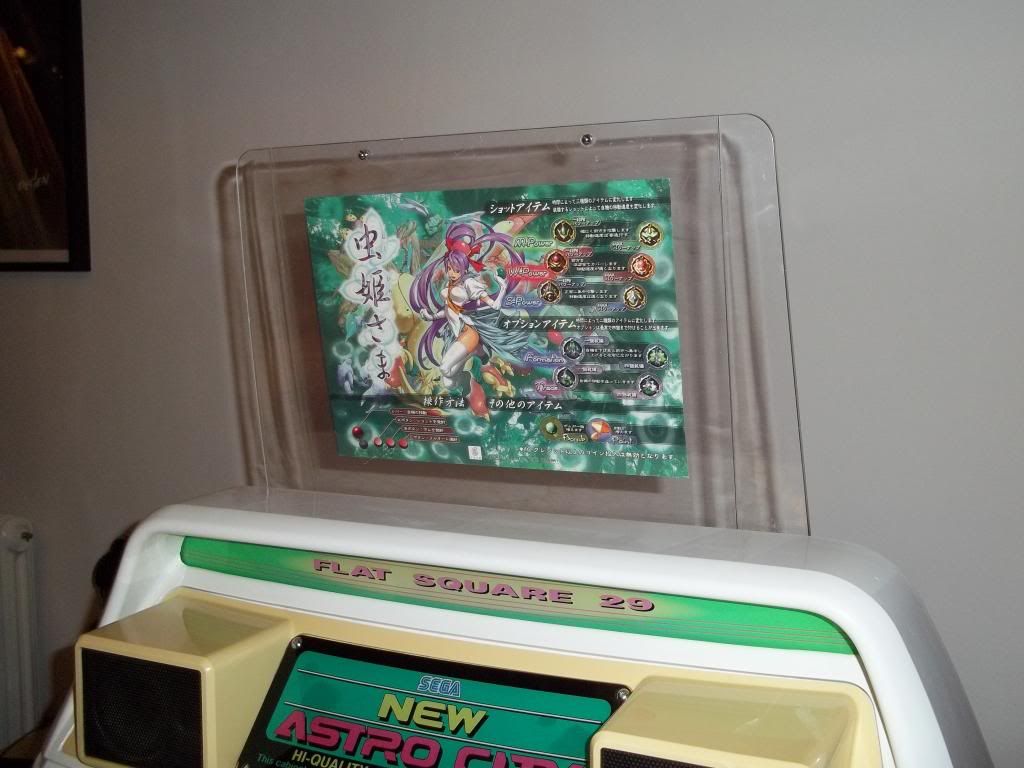
Dont confuse the shadow on the wall from the cam's flash with dirt on the marquee. It became bright and clear! It was enough clean now to put that small Mushi-Pop into action. Color-Scheme matches quite well!
I like it.
So does her royal highness, Candy the First.
Candy already demanded a white speaker surround, which will be up next
On the internets, I stumbled upons what looked like a Astro City Marquee.
10 days later, I got a acryl encrusted with dirt, stain and adhesive tape.
The Original Tape was especially nasty.
I was ****.
As If I didn't clean up enough stuff already.
Let's take this on.
First, I put it on a soft surface, and cleaned it with vinegar/soda-cleaner.
I used a blowdryer to get the tape off, and in a session I will never forget, I removed the sticker residue with goo-gone.
I had to do it several times, before I got most of the stain off.
This took my about one hour. But I got rid of most of the stain.
But the old tape residue was especially cumbersome. They became polished in the process, and were alredy very hard and not sticky at all. Some more point-blank-sessions of goo-gone required.
Some time later, it was nearly good. I chose to live with the scratches in the acrylic - since removing them would mean lots of sandpaper and electric buffing tools, which I don't have.And after all cleaning, it already looked good enough.
I looked for some screws to fix it on the cab, and some small screws and screw nuts to hold the two pieces together.
To my surprise, all of the screws I tried fitted perfectly - the screw holes on the back of the cab seems to take standard M4-Screws. Hooray!
Well ... using those standard screws, fixing it on the cab was easy as pie.
And that's how my Beauty looks right now:
Dont confuse the shadow on the wall from the cam's flash with dirt on the marquee. It became bright and clear! It was enough clean now to put that small Mushi-Pop into action. Color-Scheme matches quite well!
I like it.
So does her royal highness, Candy the First.
Candy already demanded a white speaker surround, which will be up next
-
TadCool
- 'Slayer'
- Posts: 1080
- Joined: February 14th, 2010, 3:00 pm
- Location: Japan, Chiba
- eBay: Daicombo
- Initials: RAF
Re: Candy's New Life - New Astro City Restauration
Great job on the marquee, ninn. Once again, very inspiring. 
I've grabbed one some time ago (YAJ) to see if I could save it... So, I actually can!
Mine:
I've grabbed one some time ago (YAJ) to see if I could save it... So, I actually can!
Mine:
Last edited by TadCool on March 3rd, 2013, 6:59 pm, edited 1 time in total.
Candy Cabs 4 Life.
-
crunchywasp
- stompin' an' jumpin'
- Posts: 8104
- Joined: February 10th, 2012, 2:51 pm
- Location: Northern Ireland
- eBay: crunchywasp
- Initials: MAK
-
ninn
- TheRedKnight's Lover
- Posts: 934
- Joined: September 5th, 2011, 1:24 pm
- Location: Vienna, Austria, Europe
- eBay: 8bitbitch
Re: Candy's New Life - New Astro City Restauration
Yesterday, while doing an Ibara 1CC a coin got stuck ( .... ...  ) and the game resetted. Stuck coins are especially painfull with games like Dodonpachi or Ibara, which got some cheatery protection implemented in software, which will reset the game: If the coin swith is activated some fractions of a second too long, it would display a "coin error" (and reset).
As stated earlier in this thread, I adjusted my coin-mech to accept 20 cent coins. The reject-rate is about 2%, - but 1% of the time a coin gets stuck. I re-evaluated those values yesterday, by throwing in about 200 coins and counting rates. After I finally got one to stuck, i tried to open the coin door to have a look what happend and where it got stuck. It fell while opening the door. Same again with the next coin that got stuck.
Then, it stroke me: There is only one place the coin can get stuck AND activate the coin switch at the same time: exactly AT the Coin Switch itself. I tried to reproduce that behaviour, and after some trial-and-error I found this:
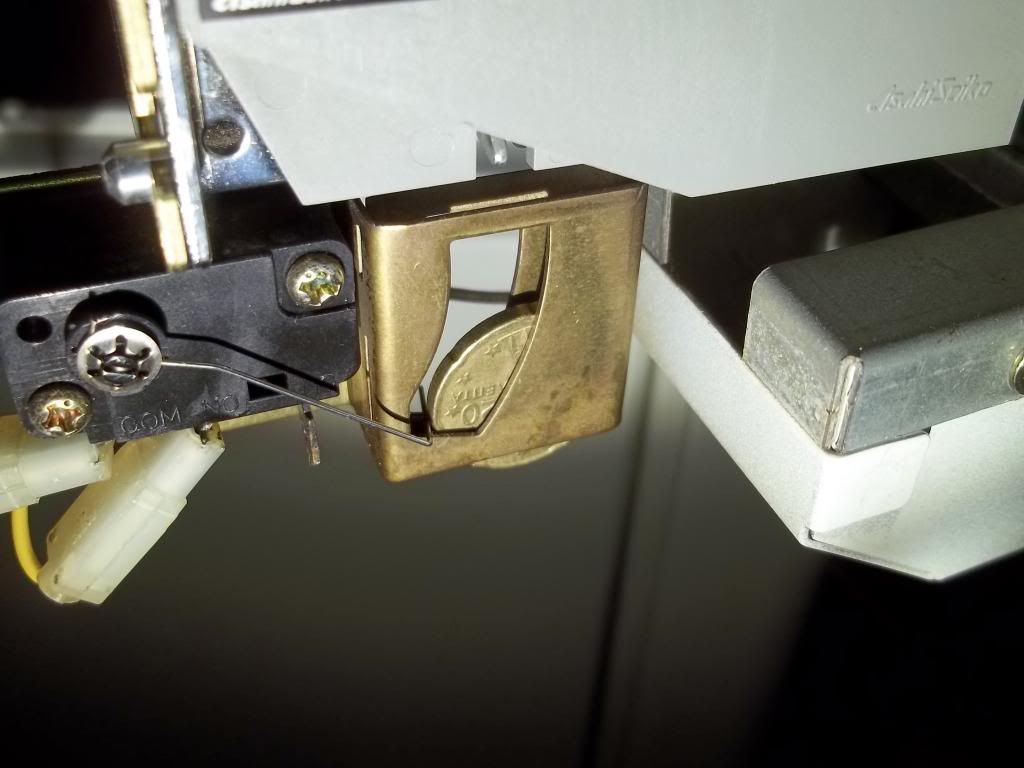

Problem identified: If the coin does not have enough force, it will hang at the very last trigger - the coin switch itself.
I had to shorten that trigger wire somehow.
After thinking for a while, I tried to bend that long part of the trigger with a plier in a small S-like shape to shorten it. But the trigger is made of metal that is anti-bending, and it sprung back to its original form. Pretty sure it would break if bent too much.
Thinking again.
So, I tried to just bend it were there was already a bending: With my fingers I tried to increase the last bending's angle from about 85° to now 90°. And that that worked!
I tested about 200 coins again, and none of it got stuck.
Easy fix, great effect! Cheap to do!
Now, I can do my infamous 2CCs and 3CCs without fear of resetting the game!
ninn
As stated earlier in this thread, I adjusted my coin-mech to accept 20 cent coins. The reject-rate is about 2%, - but 1% of the time a coin gets stuck. I re-evaluated those values yesterday, by throwing in about 200 coins and counting rates. After I finally got one to stuck, i tried to open the coin door to have a look what happend and where it got stuck. It fell while opening the door.
Then, it stroke me: There is only one place the coin can get stuck AND activate the coin switch at the same time: exactly AT the Coin Switch itself. I tried to reproduce that behaviour, and after some trial-and-error I found this:
Problem identified: If the coin does not have enough force, it will hang at the very last trigger - the coin switch itself.
I had to shorten that trigger wire somehow.
After thinking for a while, I tried to bend that long part of the trigger with a plier in a small S-like shape to shorten it. But the trigger is made of metal that is anti-bending, and it sprung back to its original form. Pretty sure it would break if bent too much.
Thinking again.
So, I tried to just bend it were there was already a bending: With my fingers I tried to increase the last bending's angle from about 85° to now 90°. And that that worked!
I tested about 200 coins again, and none of it got stuck.
Easy fix, great effect! Cheap to do!
Now, I can do my infamous 2CCs and 3CCs without fear of resetting the game!
ninn
-
ninn
- TheRedKnight's Lover
- Posts: 934
- Joined: September 5th, 2011, 1:24 pm
- Location: Vienna, Austria, Europe
- eBay: 8bitbitch
Re: Candy's New Life - New Astro City Restauration
Today i polished the metal hinge that connects the control panel upper with the case.
The brown, rusty hinge was nagging Candy and me a long time.
like a pimple on her chin.
Instead of painting the whole cab with the hinge still attached, I opted for cleaning that part individually. Candy prefered that.
So,...
I unscrewed the hinge completely from the panel and loaded my dremel with the newly purchased wire brush attachment.
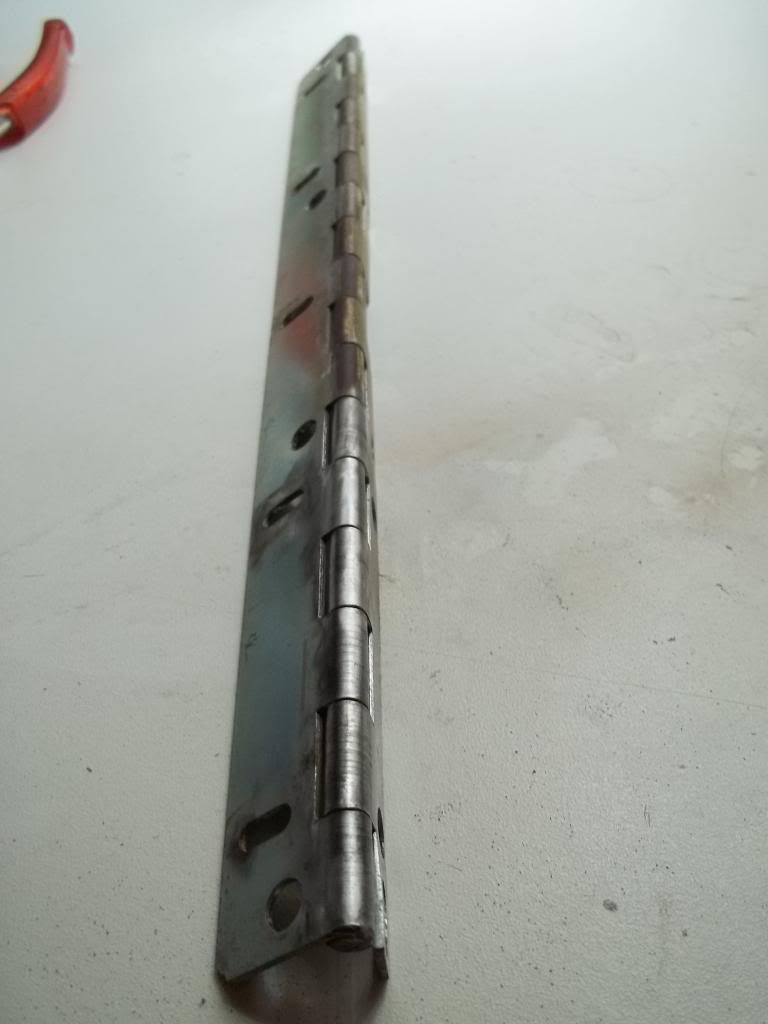
It was very easy to get the dirt and rust off.
After some minutes of work, metal wires started to fly off. One hit my eye.
If I had security glasses, I had used it.
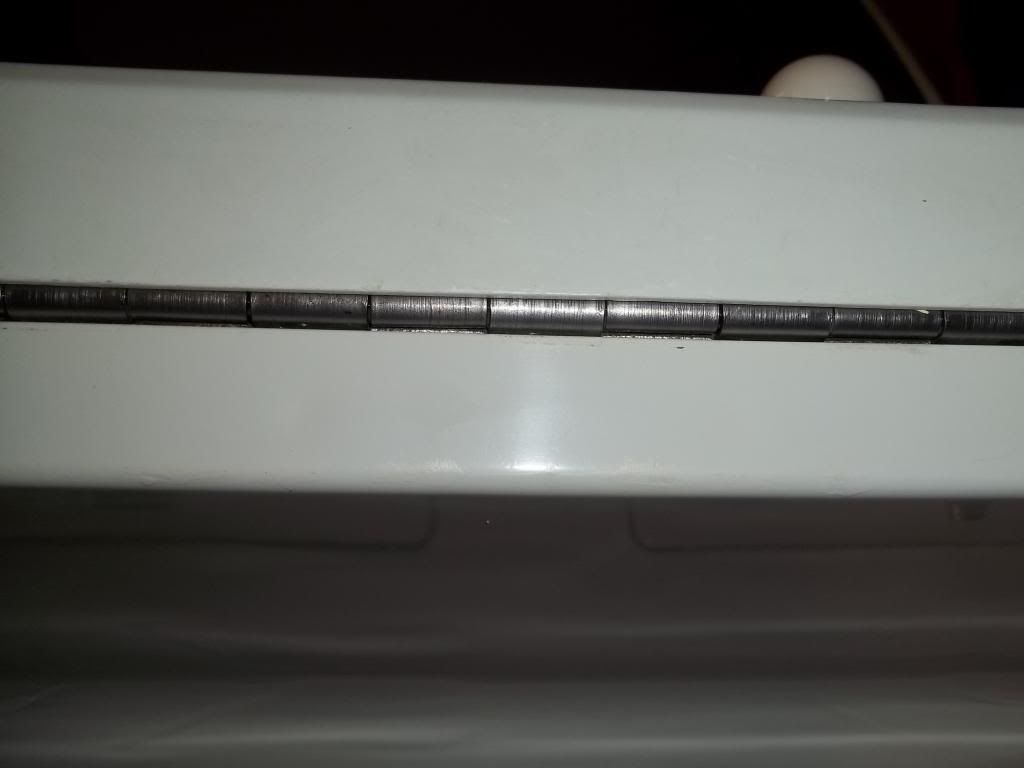
I finished working with the wire brush, - gave it a nice rub with stainless steel cleaner and soaked it in WD40 after that.
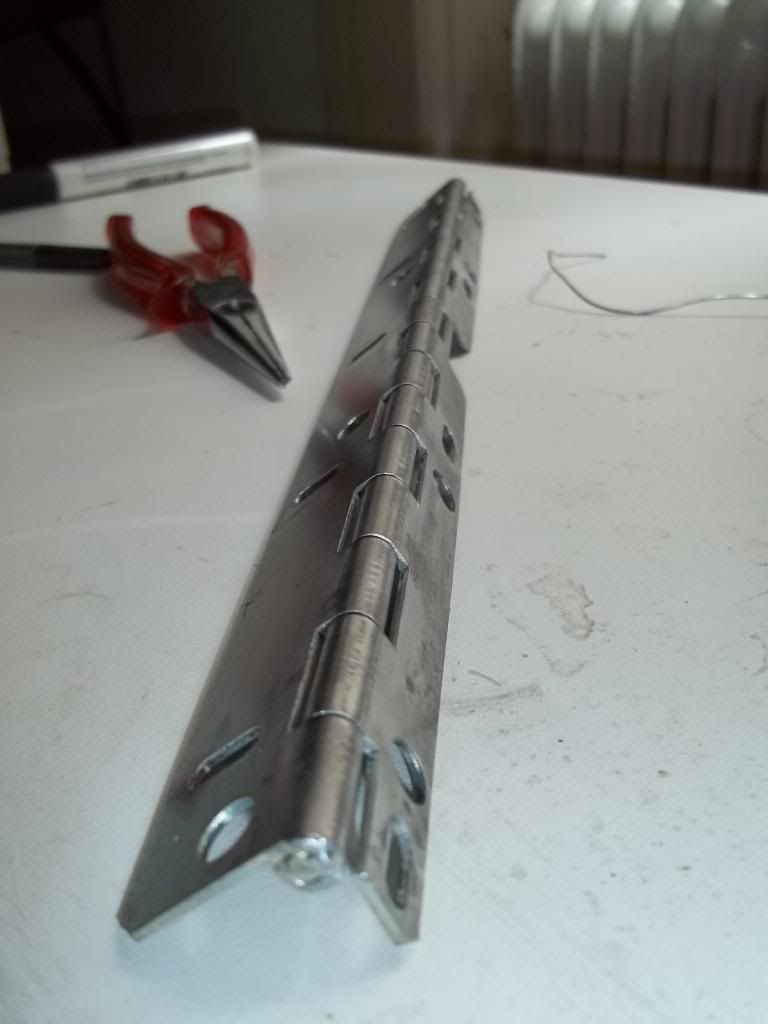
Shiny!
I made candy happier once again.
And when Candy is happy, I am happy too.
ninn
The brown, rusty hinge was nagging Candy and me a long time.
like a pimple on her chin.

Instead of painting the whole cab with the hinge still attached, I opted for cleaning that part individually. Candy prefered that.
So,...
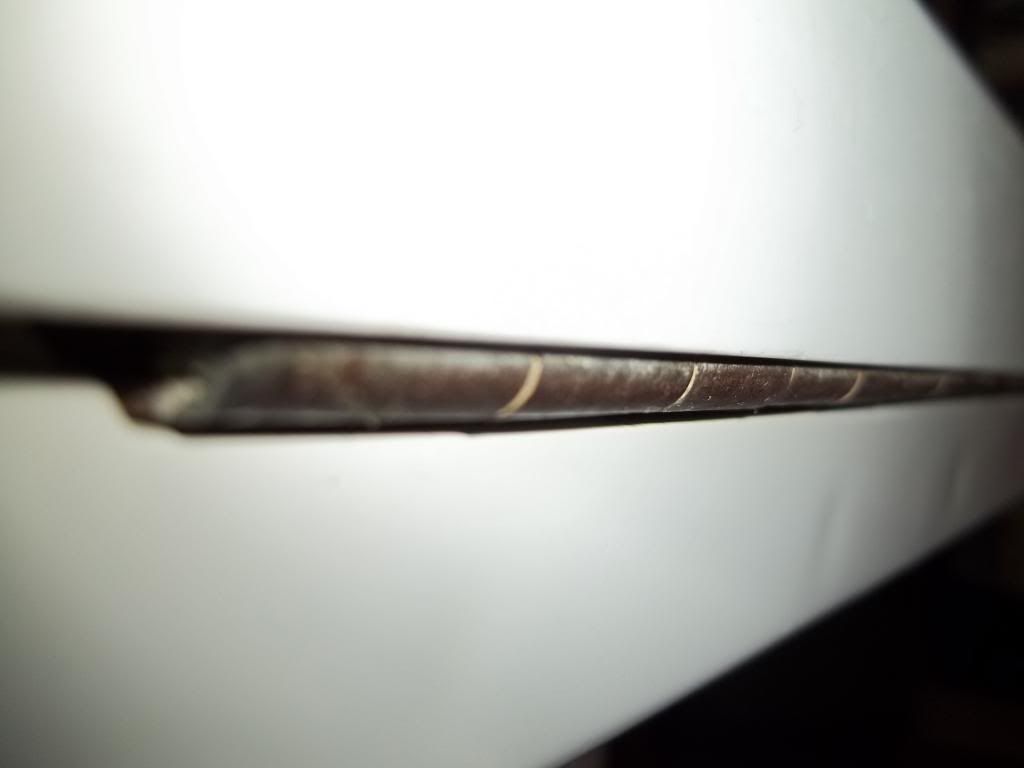
I unscrewed the hinge completely from the panel and loaded my dremel with the newly purchased wire brush attachment.
I brushed every piece and part of it, thou the front hinge part was the most important one. here you can see half way thru the process:


It was very easy to get the dirt and rust off.
After some minutes of work, metal wires started to fly off. One hit my eye.
If I had security glasses, I had used it.
I finished working with the wire brush, - gave it a nice rub with stainless steel cleaner and soaked it in WD40 after that.

Shiny!
Due to white correction, I can not show you a good picture of the finished look, but it turned out very ok!


I made candy happier once again.
And when Candy is happy, I am happy too.
ninn
-
ninn
- TheRedKnight's Lover
- Posts: 934
- Joined: September 5th, 2011, 1:24 pm
- Location: Vienna, Austria, Europe
- eBay: 8bitbitch
Re: Candy's New Life - New Astro City Restauration
Some weeks ago I got two wooden boards to mount my PCBs on. Shakey position is so 2012.
But the boards are really cheap looking... and screwing down pcbs on a board? I mean: With screws? at least 50% of my games got no feet, and all my sellers kepping all the pcb mounting feet in their cave kits. And no way I could ever afford those original 89 dollar cps2 mounting feet.
I needed something better...
Yesterday I got PCB Holders. totally forgot about them. contacted ytappers on ebay, bought some.
So... the pcb holders were too long for Candy. pulling out was a pain in the service bay. The board would not slide out, because the pcb holders were larger than the door. So I trimmed one of those holders. cheap plastic, easy to cut.
screwed the holder to the board, a pcb into the holder, slide board in.
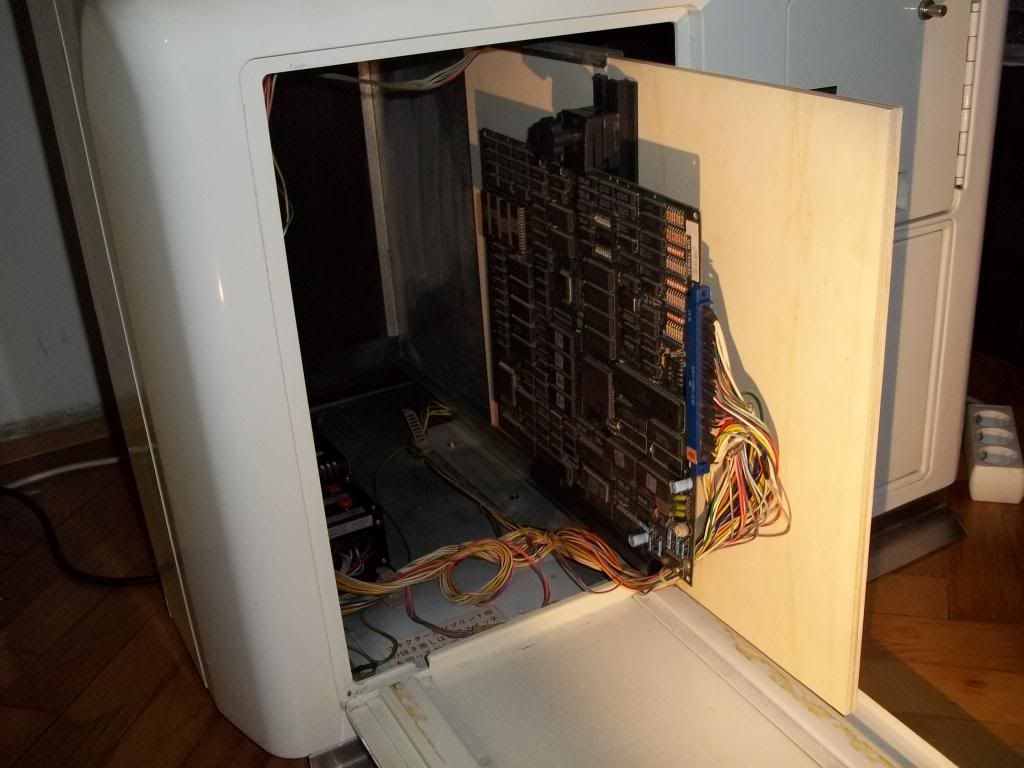
it is not as practicable as I thought. some weak points:
pcbs are not mounted very tightly. they are very stable, but attaching the jamma plug is kinda wonky.
The jamma-harness is too short. I can not pull out the board completely without unplugging first. see last point.
It is cheap pinewood. It is a cheap pcb-Holder. cheap jamma harness.
It is not perfect.
But no more free-floating PCBs.
Does not look as pro as I hoped for.
Maybe I will redo them soon.
But the boards are really cheap looking... and screwing down pcbs on a board? I mean: With screws? at least 50% of my games got no feet, and all my sellers kepping all the pcb mounting feet in their cave kits. And no way I could ever afford those original 89 dollar cps2 mounting feet.
I needed something better...
Yesterday I got PCB Holders. totally forgot about them. contacted ytappers on ebay, bought some.
So... the pcb holders were too long for Candy. pulling out was a pain in the service bay. The board would not slide out, because the pcb holders were larger than the door. So I trimmed one of those holders. cheap plastic, easy to cut.
screwed the holder to the board, a pcb into the holder, slide board in.
it is not as practicable as I thought. some weak points:
pcbs are not mounted very tightly. they are very stable, but attaching the jamma plug is kinda wonky.
The jamma-harness is too short. I can not pull out the board completely without unplugging first. see last point.
It is cheap pinewood. It is a cheap pcb-Holder. cheap jamma harness.
It is not perfect.
But no more free-floating PCBs.
Does not look as pro as I hoped for.
Maybe I will redo them soon.
-
cools

- Armed Police Buttrider
- Posts: 13616
- Joined: August 17th, 2008, 4:49 pm
- Location: Wales, United Kingdom
- eBay: hordarian
- Initials: CLS
Re: Candy's New Life - New Astro City Restauration
You're doing it wrong
Not 100% sure with the Astro, but with other cabs there's enough flex in the metal parts that hold the mounting board that it's possible to attach the PCB holder to it (leaving the top few screws looseish) and put the board in at an angle then manipulate the metal bits around - no need to cut the holder.
Then you never take the board out of the cab fully. You can slide it forward a bit to make putting PCBs in easier, but it stays put.
Attach the JAMMA edge before putting the PCB in the holder.
-
Lovecraft0110

- Posts: 60
- Joined: March 21st, 2010, 5:28 pm
- Location: Hannover, Germany (originally from Asturias, Spain)
- eBay: hidakenshin
- Initials: KPG
Re: Candy's New Life - New Astro City Restauration
Wow! Some very impressive work in this thread.
Currently playing:


-
ninn
- TheRedKnight's Lover
- Posts: 934
- Joined: September 5th, 2011, 1:24 pm
- Location: Vienna, Austria, Europe
- eBay: 8bitbitch
Re: Candy's New Life - New Astro City Restauration
Today, I had a great idea ... painting my mounting boards. On popular demand, I chose pink and green.
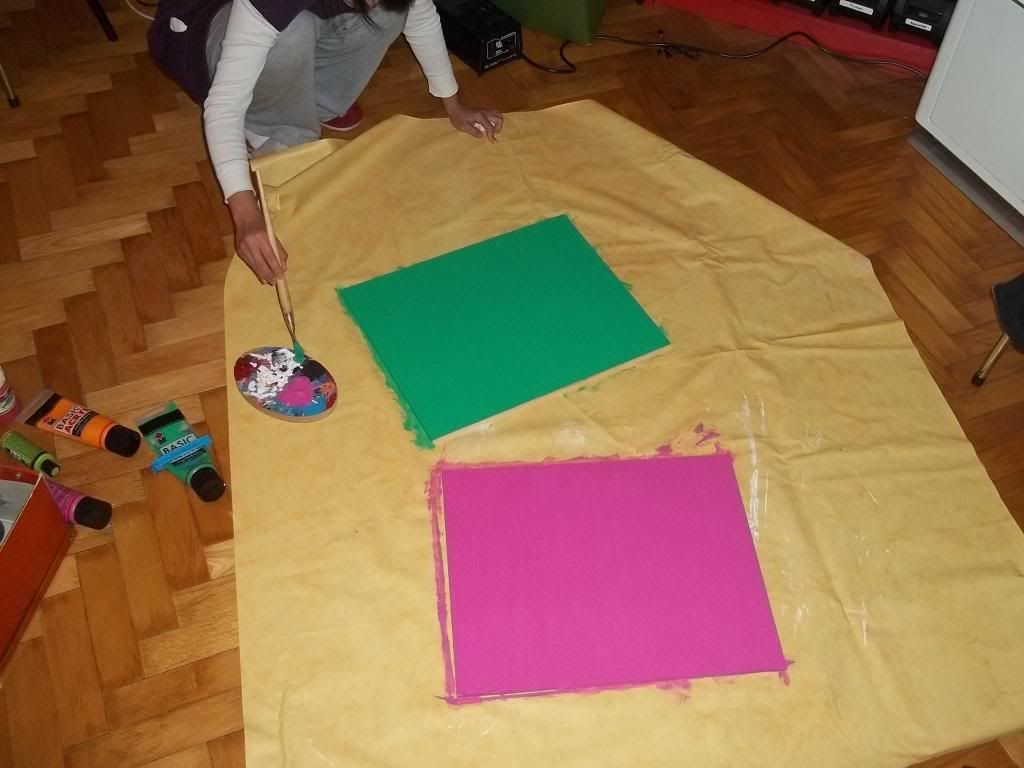
Actually, I let them paint.
not much to explain here - paint, wood, brush - ... and after a far too long wait, I could finally try them out:
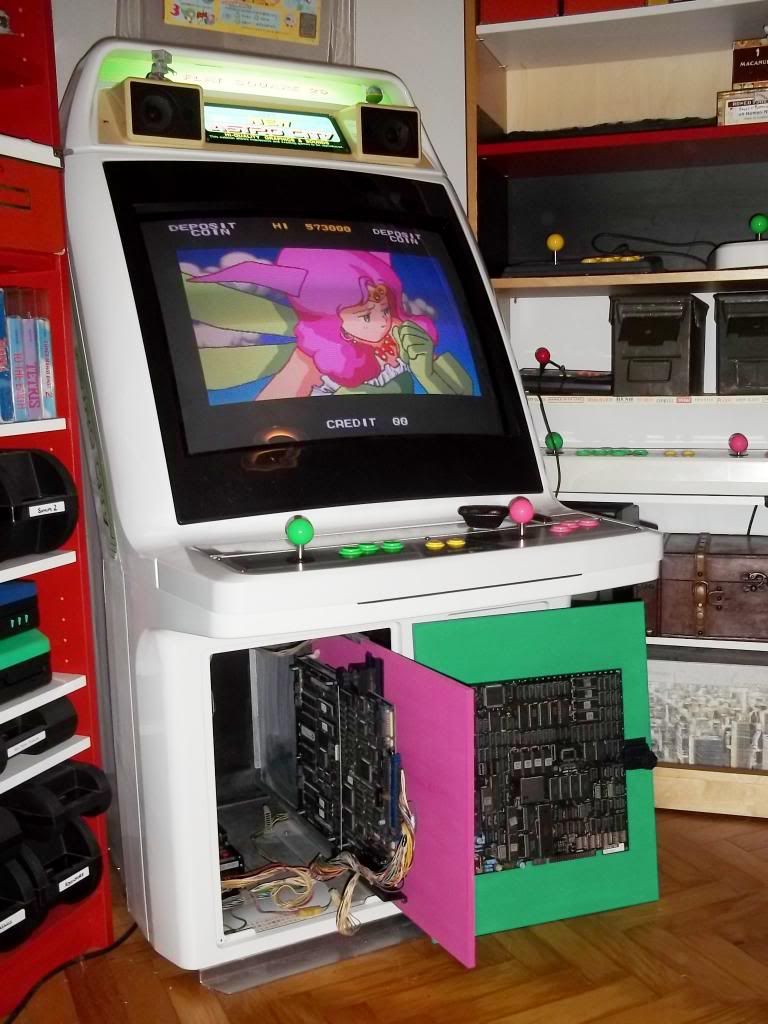
Funny! I like them and will happily use them! 
Actually, I let them paint.
not much to explain here - paint, wood, brush - ... and after a far too long wait, I could finally try them out:
Funny! I like them and will happily use them!
Last edited by ninn on February 19th, 2014, 8:51 am, edited 1 time in total.